Tuesday, November 17, 2009

I HAVE MOVED

I have moved and now have my store and gallery and tutorial section, for updated info
please go here

Saturday, October 24, 2009

Frostingle

This tutorial was written by Tamsin McAtee on 10/19/2009
Do not copy this tutorial and post through any kind of group or claim it as your own. Resemblance to any other tutorial is strictly coincidental.

You will need a tube of your choice.

I am using the Poser art of Angie which is available HERE

Font of your choice
Scrapkit I used is Frostingle By Tamsin McAtee Studios and can be purchased HERE

I used this Mask(Just right click and save in your mask folder)

1.Open a new image 500x500 white

2.Open one of the papers in the kit and resize 70%

3.Paste as a new layer on your white

4.Load mask (I have fit to canvas checked) in supplies or one of your choice and merge group

5.Add drop shadow

6.Open one of the stardangles and resize 40%

7.Paste as new layer and add drop shadow

8.Move so its dangling from the top of the mask

9.Open one of the snowmen and resize 40%

10.Paste as new layer and add drop shadow

11.Duplicate 2 times so you have 3

12.Place one in each box missing the first one out

13.Open one of the stars and resize 20%

14.Paste as new layer and add drop shadow

15.Duplicate several times and place around your tag

16.Open one of the snowflakes and resize 20%

17.Paste as new layer and add drop shadow

18.Duplicate a few times and place around your tag

19.Open your tube and resize if necessary

20.Paste as new layer and add drop shadow

21.Move to the left

22.Add copyright and watermark

23.Add your name

24.You can merge visible


Hope you enjoyed my tutorial

Thursday, October 22, 2009

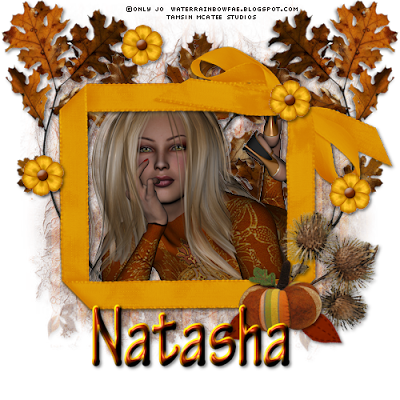
Happy Harvest

This tutorial was written by Tamsin McAtee on 10/22/2009
Do not copy this tutorial and post through any kind of group or claim it as your own. Resemblance to any other tutorial is strictly coincidental.

You will need a tube of your choice.

I am using the Poser art of Jo which is available HERE

Font of your choice
Scrapkit I used is Happy Harvest Kit By Sticky Kisses Designs and can be purchased HERE

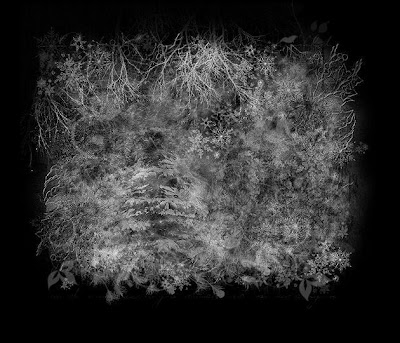
I used this Mask(Just right click and save in your mask folder)
1.Open a new image 500x500 white

2.Open one of the papers in the kit and resize 70%

3.Paste as a new layer on your white

4.Load mask (I have fit to canvas checked) in supplies or one of your choice and merge group

5.Add drop shadow

6.Open one of the frames and resize 70%

7.Paste as new layer

8.Select your magic wand and click inside the frame

9.Selections/modify/expand by 3

10.Open your tube and resize if necessary

11.Paste as new layer

12.Selections/invert/delete

13.Add drop shadow to tube

14.Move tube layer down below frame layer

15.Add drop shadow to frame layer

16.merge frame layer down with tube layer

17.Highlight mask layer

18.Open leaf 2

19.Paste as new layer and add drop shadow

20.Move to top left

21.Duplicate and mirror

22.Highlight top layer

23.Open flower 3 and resize 60%

24.Paste as new layer and add drop shadow

25.Free rotate to left 30 degrees

26.Place on bottom right of frame

27.Open felt pumpkin and resize 30%

28.Paste as new layer and add drop shadow

29.Move to bottom right of frame

30.Open one of the flowers and resize 15%

31.Paste as new layer and add drop shadow

32.Duplicate a few times and place around your tag

33.Open the felt leaf and resize 30%

34.Paste as new layer and add drop shadow

35.Free rotate to the right 30

36.Move down to the pumpkin and move layer down so the leaf is below the pumpkin

37.Duplicate and mirror and move back to pumpkin

38.Add copyright and watermark

39.Add your name

40.You can merge visible


Hope you enjoyed my tutorial

Stage Fright

This tutorial was written by Tamsin McAtee on 10/22/2009
Do not copy this tutorial and post through any kind of group or claim it as your own. Resemblance to any other tutorial is strictly coincidental.

You will need a tube of your choice.

I am using the cuties that are provided in the kit

Font of your choice
Scrapkit I used is Little Miss Sugar Kit By Cathy Cher and can be purchased HERE

I used this Mask(Just right click and save in your mask folder)

1.Open a new image 500x500 white

2.Open one of the papers in the kit and resize 70%

3.Paste as a new layer on your white

4.Load mask (I have fit to canvas checked) in supplies or one of your choice and merge group

5.Add drop shadow

6.Open the glitter and resize 70%

7.Paste as new layer and add drop shadow

8.Duplicate and mirror

9.Open the skyline and resize 55%

10.Paste as new layer and add drop shadow

11.Open the stage and resize 60%

12.Paste as new layer and add drop shadow

13.Open the star frame and resize 30%

14.Paste as new layer and add drop shadow

15.Make sure its in the middle of the stage

16.Open one of the cuties

17.Paste as new layer and add drop shadow

18.Make sure she is in the middle of the stage

19.Open the camera and resize 35%

20.Paste as new layer and add drop shadow

21.Move to bottom right

22.Open the announcer and resize 60%

23.Paste as new layer and add drop shadow

24.Mirror and move to the bottom left

25.Open one of the tiaras and resize 30%

26.Paste as new layer and add drop shadow

27.Move to the top of the stage

28.Add copyright and watermark

29.Add your name

30.You can merge visible


Hope you enjoyed my tutorial

Naturistic

This tutorial was written by Tamsin McAtee on 10/22/2009
Do not copy this tutorial and post through any kind of group or claim it as your own. Resemblance to any other tutorial is strictly coincidental.

You will need a tube of your choice.

I am using the Poser art of Jo which is available HERE

Font of your choice
Scrapkit I used is Herbal Kit By Rieneke Designs and can be purchased HERE

I used this Mask(Just right click and save in your mask folder)

1.Open a new image 500x500 white

2.Open one of the papers in the kit and resize 70%

3.Paste as a new layer on your white

4.Load mask (I have fit to canvas checked) in supplies or one of your choice and merge group

5.Add drop shadow

6.Open the hummingbird and resize 50%

7.Paste as new layer and add drop shadow

8.Move to top right

9.Open one of the ornaments and resize 70%

10.Paste as new layer and add drop shadow

11.Move to the left

12.Open one of the flowers and resize 20%

13.Paste as new layer and add drop shadow

14.Duplicate several times and place around your tag

15.Open one of the bead strings and resize 30%

16.Paste as new layer and add drop shadow

17.Move to the hummingbird flowers on the right

18.Open one of the butterflys and resize 20%

19.Paste as new layer and add drop shadow

20.Move to one of the flowers

21.Open your tube and resize if necessary

22.Paste as new layer and add drop shadow

23.Move to the left

24.Add copyright and watermark

25.Add your name

26.You can merge visible


Hope you enjoyed my tutorial

BCA

This tutorial was written by Tamsin McAtee on 10/22/2009
Do not copy this tutorial and post through any kind of group or claim it as your own. Resemblance to any other tutorial is strictly coincidental.

You will need a tube of your choice.

I am using the Poser art of Jo which is available HERE

Font of your choice
Scrapkit I used is Fight For Life BCA Kit By Funky Fever and can be purchased HERE

I used this Mask(Just right click and save in your mask folder)
1.Open a new image 500x500 white

2.Open one of the papers in the kit and resize 70%

3.Paste as a new layer on your white

4.Load mask (I have fit to canvas checked) in supplies or one of your choice and merge group

5.Add drop shadow

6.Open the fancy flower

7.Paste as new layer and add drop shadow

8.Open the wand and resize 80%

9.Paste as new layer and add drop shadow

10.Move to the right

11.Open one of the sequins and resize 20%

12.Paste as new layer and add drop shadow

13.Duplicate a few times and place around your tag

14.Open the stars and resize 30%

15.Paste as new layer and add drop shadow

16.Move to bottom right

17.Open one of the awareness ribbons and resize 20%

18.Paste as new layer and add drop shadow

19.Move to the stars

20.Open your tube and resize if necessary

21.Paste as new layer and add drop shadow

21.Add copyright and watermark

22.Add your name

23.You can merge visible


Hope you enjoyed my tutorial


Tuesday, October 20, 2009

Mocha Baby

This tutorial was written by Tamsin McAtee on 10/19/2009
Do not copy this tutorial and post through any kind of group or claim it as your own. Resemblance to any other tutorial is strictly coincidental.

You will need a tube of your choice.

I am using the Poser art of Angie which is available HERE

Font of your choice
Scrapkit I used is Mocha Baby By TaggingangelsnScrap and can be purchased HERE

I used this Mask(Just right click and save in your mask folder)
1.Open a new image 500x500 white

2.Open one of the papers in the kit and resize 70%

3.Paste as a new layer on your white

4.Load mask (I have fit to canvas checked) in supplies or one of your choice and merge group

5.Add drop shadow

6.Open one of the flowers

7.Paste as new layer and add drop shadow

8.Move to the top right

9.Open one of the dangles and resize 15%

10.Paste as new layer and add drop shadow

11.Move to the flower

12.Open one of the other flowers and resize 5%

13.Paste as new layer and add drop shadow

14.Duplicate a few times and place around your tag

15.Open another flower and resize 5%

16.Paste as new layer and add drop shadow

17.Duplicate several times and place around your tag

18.Open your tube and resize if necessary

19.Paste as new layer and add drop shadow

20.Add copyright and watermark

21.Add your name

22.You can merge visible


Hope you enjoyed my tutorial