Tuesday, June 30, 2009

Coy

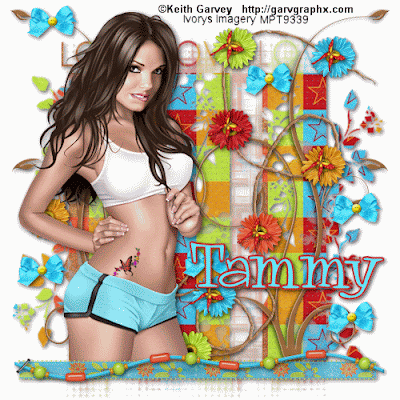
This tutorial was written by Ivory on 06/30/2009
Do not copy this tutorial and post through any kind of group or claim it as your own. Resemblance to any other tutorial is strictly coincidental.

You will need a tube of your choice.
I am using the FTU poser art of Only Jo available HERE

Font of your choice
Scrapkit I used is Just Sheepy By Krissy Scraps and can be purchased HERE

I used these Masks(Just right click and save in your mask folder)



1.Open a new image 500x500 white

2.Open one of the papers in the kit and resize 70%

3.Paste as a new layer on your white

4.Load mask (I have fit to canvas checked) in supplies or one of your choice
and merge group

5.Open a new paper and resize 70%

6.Paste as new layer

7.Load mask (I have fit to canvas checked) in supplies or one of your choice
and merge group

8.Add drop shadow and resize 70%

9.Open your tube and resize if necessary

10.Paste as new layer and add drop shadow

11.Using your eraser, erase the the bottom part of the tube that comes over
the mask layer

12.Open one of the card flowers and resize 30%

13.Paste as new layer and add drop shadow

14.Move to the bottom left of the circle

15.Duplicate and move this one to the right and down a little so its
overlapping the other

16.Open one of the gingham flowers and resize 20%

17.Paste as new layer and add drop shadow

18.Move to the card flowers and create a cluster

19.Duplicate and move up in your cluster

20.Create this whole cluster again on the right side of the circle

21.Open one of the metal brads and resize 20%

22.Paste as new layer and add drop shadow

23.Duplicate several times and place around your tag

24.Open one of the buttons and resize 15%

25.Paste as new layer and add drop shadow

26.Duplicate several times and place around your tag

27.Open one of the bows and resize 20%

28.Paste as new layer and add drop shadow

29.Move to one end of the flower cluster

30.Duplicate and mirror

31.Add copyright and watermark

32.Add your name

33.You can merge visible


Hope you enjoyed my tutorial

Perfection

This tutorial was written by Ivory on 06/30/2009
Do not copy this tutorial and post through any kind of group or claim it as your own. Resemblance to any other tutorial is strictly coincidental.

You will need a tube of your choice.
I am using the poser art included in the kit

Font of your choice
Scrapkit I used is Perfection By Scrappin With Lil Ole Me and can be purchased
HERE

I used this Mask(Just right click and save in your mask folder)
1.Open a new image 500x500 white

2.Open one of the papers in the kit and resize 70%

3.Paste as a new layer on your white

4.Load mask (I have fit to canvas checked) in supplies or one of your choice
and merge group
5.Add drop shadow

6.Open the jeweled beads

7.Paste as new layer and add drop shadow

8.Open the hanging beads and resize 70%

9.Paste as new layer and add drop shadow

10.Move to the top right

11.Open one of the bows and resize 20%

12.Paste as new layer and add drop shadow

13.Move to the top of the bead dangle

14.Open one of the flowers and resize 10%

15.Paste as new layer and add drop shadow

16.Duplicate several times and place around your tag

17.Open the poser and resize to your liking

18.Paste as new layer and add drop shadow

19.Move to the left a little

20.Open the wordart beadstring and resize 55%

21.Paste as new layer and add drop shadow

22.Move to the bottom of the tag

23.Open the wordcard and resize 30%

24.Paste as new layer and add drop shadow

25.Move to the right

26.Free rotate 8 to the left

27.Open the pin and resize 40%

28.Paste as new layer and add drop shadow

29.Move to one of the corners of the wordcard

30.Using your eraser tool, erase the part of the pin that would be threaded
thru the card

31.Add copyright and watermark

32.Add your name

33.You can merge visible


Hope you enjoyed my tutorial

Flower Gatherer

This tutorial was written by Ivory on 06/29/2009
Do not copy this tutorial and post through any kind of group or claim it as your own. Resemblance to any other tutorial is strictly coincidental.

You will need a tube of your choice.
I am using the poser art of Only Jo which is free and available HERE

Font of your choice
Scrapkit I used is Mari Meri Twinkle By Crazy Lady Scraps and can be purchased HERE

I used this Mask(Just right click and save in your mask folder)

1.Open a new image 500x500 white

2.Open one of the papers in the kit and resize 70%

3.Paste as a new layer on your white

4.Load mask (I have fit to canvas checked) in supplies or one of your choice and merge group

5.Add drop shadow

6.Open the glitter swirl and resize 70%

7.Paste as new layer and add drop shadow

8.Move to the right

9.Duplicate and mirror

10.Open one of the flowers and resize 40%

11.Paste as new layer and add drop shadow

12.Duplicate several times and place around your tag

13.Open one of the bows and resize 10%

14.Paste as new layer and add drop shadow

15.Duplicate several times and place around your tag

16.Open the grass and resize 50%

17.Paste as new layer and add drop shadow

18.Move to the bottom

19.Paste as new layer and add drop shadow

20.Open one of the tulips and resize 30%

21.Paste as new layer and add drop shadow

22.Move to the grass

23.Open another tulip and resize 20%

24.Paste as new layer and add drop shadow

25.Open your tube and resize if necessary

26.Paste as new layer and add drop shadow

27.Move to the left

28.Open the basket and resize 30%

29.Paste as new layer and add drop shadow

30.Move to your tubes feet

31.Add copyright and watermark

32.Add your name

33.You can merge visible


Hope you enjoyed my tutorial

Butterfly Fae

This tutorial was written by Ivory on 06/29/2009
Do not copy this tutorial and post through any kind of group or claim it as your own. Resemblance to any other tutorial is strictly coincidental.

You will need a tube of your choice.
I am using the poser art of Only Jo which is free and available HERE
Font of your choice
Scrapkit I used is Breena Blossom By Crazy Lady Scraps and can be purchased HERE

I used this Mask(Just right click and save in your mask folder)

1.Open a new image 500x500 white

2.Open one of the papers in the kit and resize 70%

3.Paste as a new layer on your white

4.Load mask (I have fit to canvas checked) in supplies or one of your choice and merge group

5.Add drop shadow

6.Open the beads

7.Paste as new layer and add drop shadow

8.Move to the bottom right

9.Open the light with flutters and resize 55%

10.Paste as new layer/ mirror

11.Move to the top right

12.Open one of the ribbons and resize 50%

13.Paste as new layer and add drop shadow

14.Mirror and move to the bottom left

15.Open one of the flowers and resize 15%

16.Paste as new layer and add drop shadow

17.Duplicate and place one on each end of the ribbon

18.Open one of the butterflys and resize 20%

19.Paste as new layer and add drop shadow

20.Duplicate several times and place around your tag

21.OPen the windchime and resize 40%

22.Paste as new layer and add drop shadow

23.Move to the top corner of the light flash

24.Open your tube and resize if necessary

25.Paste as new layer and add drop shadow

26.Move to the left

27.Add copyright and watermark

28.Add your name

29.You can merge visible


Hope you enjoyed my tutorial

Monday, June 29, 2009

On The Beach

This tutorial was written by Ivory on 06/28/2009
Do not copy this tutorial and post through any kind of group or claim it as your own. Resemblance to any other tutorial is strictly coincidental.

You will need a tube of your choice.
I am using the art of Ismael Rac which you can purchase HERE

Font of your choice
Scrapkit I used is Beach House By Jillann Creations and can be purchased HERE

I used this Mask(Just right click and save in your mask folder)

1.Open a new image 500x500 white

2.Open one of the papers in the kit and resize 70%

3.Paste as a new layer on your white

4.Load mask (I have fit to canvas checked) in supplies or one of your choice and merge group

5.Add drop shadow

6.Open one of the circle doodles

7.Paste as new layer and add drop shadow

8.Open the twine swirl and resize 80%

9.Paste as new layer and add drop shadow

10.Open one of the shells and resize 20%

11.Paste as new layer and add drop shadow

12.Duplicate several times and place around the twine

13.Open one of the flowers and resize 20%

14.Paste as new layer and add drop shadow

15.Duplicate a few times and place around your tag

16.Open one of the knotted ribbons and resize 60%

17.Paste as new layer and add drop shadow

18.Move to the bottom of your tag

19.OPen a different shell and resize 15%

20.Paste as new layer and add drop shadow

21.Duplicate a few times and place around your tag

22.Open your tube and resize if necessary

23.Paste as new layer and add drop shadow

24.Add copyright and watermark

25.Add your name

26.You can merge visible


Hope you enjoyed my tutorial

Tuesday, June 23, 2009

Hot Rock

This tutorial was written by Ivory on 06/22/2009
Do not copy this tutorial and post through any kind of group or claim it as your own. Resemblance to any other tutorial is strictly coincidental.

You will need a tube of your choice.
I am using the art of Ismael Rac which you can purchase HERE

Font of your choice
Scrapkit I used is Beautiful Music By Alyssa's Scraps and such and can be purchased HERE

I used this Mask(Just right click and save in your mask folder)

1.Open a new image 500x500 white

2.Open one of the papers in the kit and resize 70%

3.Paste as a new layer on your white

4.Load mask (I have fit to canvas checked) in supplies or one of your choice and merge group

5.Add drop shadow

6.Open one of the circle frames and resize 50%

7.Paste as new layer and add drop shadow

8.Open one of the diamondrain and resize 45%

9.Paste as new layer and add drop shadow

10.Move layer below frame layer

11.Highlight top layer

12.OPen the notes and resize 50%

13.Paste as new layer and add drop shadow

14.Move to the top left

15.Open doodle 4 and resize 60%

16.Paste as new layer and add drop shadow

17.Move to the right of your tag

18.Open one of th curly ribbons and resize 60%

19.Paste as new layer and add drop shadow

20.Move so the end is on the one end of the doodle

21.Open one of the roses and resize 15%

22.Paste as new layer and add drop shadow

23.Move to the top end of the ribbon

24.Open one of the gems and resize 30%

25.Paste as new layer and add drop shadow

26.Duplicate several times and paste around your tag

27.Open your tube and resize if necessary

28.Paste as new layer and add drop shadow

29.Move slightly to the left

30.Add copyright and watermark

31.Add your name

32.You can merge visible


Hope you enjoyed my tutorial

Saturday, June 13, 2009

Wild Thing

This tutorial was written by Ivory on 06/13/2009
Do not copy this tutorial and post through any kind of group or claim it as your own. Resemblance to any other tutorial is strictly coincidental.

You will need a tube of your choice.
I am using the art of Keith Garvey which you can purchase HERE

Font of your choice
Scrapkit I used is Urban Collection - wild By Rieneke Designs and can be purchased HERE

I used this Mask(Just right click and save in your mask folder)
1.Open a new image 500x500 white

2.Open one of the papers in the kit and resize 70%

3.Paste as a new layer on your white

4.Load mask (I have fit to canvas checked) in supplies or one of your choice and merge group

5.Add drop shadow

6.Click on text tool and write text of choice

7.Place at the top and add drop shadow, (I used one of the papers)

8.Open one of the ribbons and resize 70%

9.Paste as new layer and add drop shadow

10.Use it to underline the text

11.Open one of the strings and resize 30%

12.Paste as new layer and add drop shadow

13.Move to the right side of the text

14.Open one of the flowers and resize 20%

15.Paste as new layer and add drop shadow

16.Duplicate a few times and place around your tag

17.Open one of the buttons and resize 20%

18.Paste as new layer and add drop shadow

19.Duplicate several times and place around your tag

20.Open one of the bows and resize 20%

21.Paste as new layer and add drop shadow

22.Free rotate 20 to the right

23.Duplicate several times and place around your tag

24.Mirror some of them

25.Open your tube and resize if necessary

26.Paste as new layer and add drop shadow

27.Add copyright and watermark

28.Add your name

29.You can merge visible


Hope you enjoyed my tutorial


Chardonnay

This tutorial was written by Ivory on 06/13/2009
Do not copy this tutorial and post through any kind of group or claim it as your own. Resemblance to any other tutorial is strictly coincidental.

You will need a tube of your choice.
I am using the art of Keith Garvey which you can purchase HERE

Font of your choice
Scrapkit I used is The Winery - Chardonnay By Ivorys Designz and can be purchased HERE

I used this Mask(Just right click and save in your mask folder)

1.Open a new image 500x500 white

2.Open one of the papers in the kit and resize 70%

3.Paste as a new layer on your white

4.Load mask (I have fit to canvas checked) in supplies or one of your choice and merge group

5.Add drop shadow

6.Open one of the sequinsprays and resize 65%

7.Paste as new layer and add drop shadow

8.Open one of the circle frames

9.Paste as new layer and add drop shadow

10.Select magic wand and click inside the frame

11.Expand by 3

12.Open your tube and resize if necessary

13.Paste as new layer

14.Invert and delete/select none

15.Add drop shadow

16.Move tube layer below frame layer

17.Highlight frame layer and add drop shadow

18.Merge frame layer down with tube layer

19.Open one of the bows and resize 70%

20.Paste as new layer and add drop shadow

21.Move to the bottom left of the frame

22.Open one of the flowers and resize 40%

23.Paste as new layer and add drop shadow

24.Move to the middle of the bow

25.Open one of the buttons and resize 20%

26.Paste as new layer and add drop shadow

27.Duplicate and place one either side of the flower

28.Open one of the stars and resize 70%

29.Paste as new layer and add drop shadow

30.Duplicate and place in the bow cluster

31.Open one of the butterflys and resize 30%

32.Paste as new layer and add drop shadow

33.Move to the flower

34.Add copyright and watermark

35.Add your name

36.You can merge visible


Hope you enjoyed my tutorial

Blush

This tutorial was written by Ivory on 06/13/2009
Do not copy this tutorial and post through any kind of group or claim it as your own. Resemblance to any other tutorial is strictly coincidental.

You will need a tube of your choice.
I am using the art of Keith Garvey which you can purchase HERE

Font of your choice
Scrapkit I used is The Winery - Blush By Ivorys Designz and can be purchased HERE

I used this Mask(Just right click and save in your mask folder)

1.Open a new image 500x500 white

2.Open one of the papers in the kit and resize 70%

3.Paste as a new layer on your white

4.Load mask (I have fit to canvas checked) in supplies or one of your choice and merge group

5.Add drop shadow

6.Open one of the glittersprays and resize 65%

7.Paste as new layer and add drop shadow

8.Open the leaves and resize 70%

9.Paste as new layer and add drop shadow

10.Move to the top

11.Duplicate, flip,mirror

12.Open one of the strings and resize 60%

13.Paste as new layer and add drop shadow

14.Move to right

15.Duplicate and mirror

16.Open one of the flowers and resize 20%

17.Paste as new layer and add drop shadow

18.Duplicate several times and place around your tag

19.Open one of the bows and resize 20%

20.Paste as new layer and add drop shadow

21.Duplicate a few times and place around your tag

22.Open your tube and resize if necessary

23.Paste as new layer and add drop shadow

24.Add copyright and watermark

25.Add your name

26.You can merge visible


Hope you enjoyed my tutorial

Cabernet

This tutorial was written by Ivory on 06/13/2009
Do not copy this tutorial and post through any kind of group or claim it as your own. Resemblance to any other tutorial is strictly coincidental.

You will need a tube of your choice.
I am using the art of Ismael Rac which you can purchase HERE

Font of your choice
Scrapkit I used is The Winery - Cabernet By Ivorys Designz and can be purchased HERE

I used this Mask(Just right click and save in your mask folder)
1.Open a new image 500x500 white

2.Open one of the papers in the kit and resize 70%

3.Paste as a new layer on your white

4.Load mask (I have fit to canvas checked) in supplies or one of your choice and merge group

5.Add drop shadow

6.Open one of the letters and resize 60%

7.Paste as new layer and add drop shadow

8.Move down

9.Open branch 3 resize 70%

10.Paste as new layer and add drop shadow

11.Move to the right

12.Open the glass and resize 20%

13.Paste as new layer and add drop shadow

14.Move to bottom left

15.Open the bottle and resize 30%

16.Paste as new layer and add drop shadow

17.Move next to the glass

18.Open the grapes and resize 30%

19.Paste as new layer and add drop shadow

20.Move to just above the glass

21.Open one of the journalling and resize 75%

22.Paste as new layer and add drop shadow

23.Move to top right

24.Add New layer

25.Select text tool and write text of choice on the journalling

26.Open your tube and resize if necessary

27.Paste as new layer and add drop shadow

28.Add copyright and watermark

29.Add your name

30.You can merge visible


Hope you enjoyed my tutorial


Coconut Creme

This tutorial was written by Ivory on 06/13/2009
Do not copy this tutorial and post through any kind of group or claim it as your own. Resemblance to any other tutorial is strictly coincidental.

You will need a tube of your choice.
I am using the art of Elias Chatzoudis which you can purchase HERE

Font of your choice
Scrapkit I used is Hotel Chocolat - Coconut Creme By Ivorys Designz and can be purchased HERE

I used this Mask(Just right click and save in your mask folder)

1.Open a new image 500x500 white

2.Open one of the papers in the kit and resize 70%

3.Paste as a new layer on your white

4.Load mask (I have fit to canvas checked) in supplies or one of your choice and merge group

5.Add drop shadow

6.Open one of the circle frames

7.Paste as new layer

8.Open a different paper and resize 70%

9.Click on your magic wand and click inside the frame

10.Expand by 3

11.Copy and paste your paper as new layer

12.Invert/delete/select none

13.Move paper layer below frame layer

14.Highlight frame layer

15.With the magic wand and click inside the frame

16.Open your close up tube and resize if necessary

17.Paste as new layer

18.Invert/delete/select none

19.Move the tube layer below frame layer

20.Add drop shadow to tube layer

21.Highlight frame layer and add drop shadow

22.Merge frame layer down with tube layer and again with paper layer

23.Open one of the flowers and resize 50%

24.Paste as new layer and add drop shadow

25.Move to the top left of the frame

26.Duplicate and overlap a little

27.Open a different color flower and resize 40%

28.Paste as new layer and add drop shadow

29.Move to the middle of the two flowers and down a little

30.Open one of the butterflys and resize 30%

31.Paste as new layer and add drop shadow

32.Move to the middle of the smaller flower

33.Open one of the bows and resize 40%

34.Paste as new layer and add drop shadow

35.Move to the right of the flowers

36.Duplicate and mirror

37.Move to the other side of the flowers

38.Open one of the stars and resize 20%

39.Paste as new layer and add drop shadow

40.Duplicate several times and paste around your tag

41.Open a different star and resize 20%

42.Paste as new layer and add drop shadow

43.Duplicate a few times and place around your tag

44.Open a different flower and resize 10%

45.Paste as new layer and add drop shadow

46.Duplicate several times and place around your tag

29.Add copyright and watermark

30.Add your name

31.You can merge visible


Hope you enjoyed my tutorial

Fresh

This tutorial was written by Ivory on 06/12/2009
Do not copy this tutorial and post through any kind of group or claim it as your own. Resemblance to any other tutorial is strictly coincidental.
You will need a tube of your choice.
I am using the art of Keith Garvey which you can purchase HERE

Font of your choice
Scrapkit I used is Naturally Fresh By Krissy Scraps and can be purchased HERE

I used this Mask(Just right click and save in your mask folder)

1.Open a new image 500x500 white

2.Open one of the papers in the kit and resize 70%

3.Paste as a new layer on your white

4.Load mask (I have fit to canvas checked) in supplies or one of your choice and merge group

5.Add drop shadow

6.Open the ivy

7.Paste as new layer and add drop shadow

8.Move to the top right

9.Open one of the corset ribbons and resize 50%

10.Paste as new layer and add drop shadow

11.Move to the left

12.Open one of the drapes and resize 55%

13.Paste as new layer and add drop shadow

14.Move to the top of the ivy

15.Open one of the hangers and resize 60%

16.Paste as new layer and add drop shadow

17.Move to the drape

18.Open one of the ribbon clusters and resize 30%

19.Paste as new layer and add drop shadow

20.Move to the top of the hanger

21.Open one of the lace bows and resize 30%

22.Paste as new layer and add drop shadow

23.Move to the middle of the ribbon cluster

24.Open one of the flowers and resize 10%

25.Paste as new layer and add drop shadow

26.Duplicate several times and place around around your tag

27.Open your tube and resize if necessary

28.Paste as new layer and add drop shadow

29.Add copyright and watermark

30.Add your name

31.You can merge visible


Hope you enjoyed my tutorial

Tuesday, June 9, 2009

Chica

This tutorial was written by Ivory on 06/09/2009
Do not copy this tutorial and post through any kind of group or claim it as your own. Resemblance to any other tutorial is strictly coincidental.

You will need a tube of your choice.
I am using the art of Keith Garvey which you can purchase HERE

Font of your choice
Scrapkit I used is ChaChaCha By Foxys Designz and can be purchased HERE

I used this Mask(Just right click and save in your mask folder)

1.Open a new image 500x500 white

2.Open one of the papers in the kit and resize 70%

3.Paste as a new layer on your white

4.Load mask (I have fit to canvas checked) in supplies or one of your choice and merge group

5.Add drop shadow

6.Open one of the flower doodles

7.Paste as new layer and add drop shadow

8.Move to the right

9.Duplicate and mirror

10.Open ribbon1 and resize 50%

11.Paste as new layer and add drop shadow

12.Free rotate 90 to the right

13.Mirror and move to the right

14.Open string1 and resize 85%

15.Paste as new layer and add drop shadow

16.Move to the ribbon

17.Open bow 2 and resize 30%

18.Paste as new layer and add drop shadow

19.Move to the middle of the string

20.Open bow 4 and resize 10%

21.Paste as new layer and add drop shadow

22.Duplicate several times and place around your tag

23.Open flower 6 and resize 10%

24.Paste as new layer and add drop shadow

25.Add copyright and watermark

26.Add your name

27.You can merge visible


Hope you enjoyed my tutorial

Flower Frenzy

This tutorial was written by Ivory on 06/09/2009
Do not copy this tutorial and post through any kind of group or claim it as your own. Resemblance to any other tutorial is strictly coincidental.

You will need a tube of your choice.
I am using the art of Elias Chatzoudis which you can purchase HERE

Font of your choice
Scrapkit I used is Cupcake Sprinkles By Made By Justine and can be purchased HERE

I used this Mask(Just right click and save in your mask folder)
1.Open a new image 500x500 white

2.Open one of the papers in the kit and resize 80%

3.Paste as a new layer on your white

4.Load mask (I have fit to canvas checked) in supplies or one of your choice and merge
group

5.Add drop shadow

6.Open one of the flower doodles and resize 60%

7.Paste as new layer and add drop shadow

8.Move to the right

9.Duplicate and mirror

10.Open one of the flowers and resize 20%

11.Paste as new layer and add drop shadow

12.Duplicate a few times and place around your tag

13.Open one of the buttons and resize 20%

14.Paste as new layer and add drop shadow

15.Duplicate several times and place around your tag

16.Open your tube and resize if necessary

17.Paste as new layer and add drop shadow

18.Add copyright and watermark

19.Add your name

20.You can merge visible


Hope you enjoyed my tutorial

Kate

This tutorial was written by Ivory on 06/09/2009
Do not copy this tutorial and post through any kind of group or claim it as your own. Resemblance to any other tutorial is strictly coincidental.

You will need a tube of your choice.
I am using the art of Elias Chatzoudis which you can purchase HERE

Font of your choice
Scrapkit I used is Kate By Pimp'd Dezigns and can be purchased HERE

I used this Mask(Just right click and save in your mask folder)

1.Open a new image 500x500 white

2.Open one of the papers in the kit

3.Paste as a new layer on your white

4.Load mask (I have fit to canvas checked) in supplies or one of your choice and merge group

5.Open the chrome swirl and resize 50%

6.Paste as new layer and add drop shadow.

7.Move to the bottom

8.Open the beads and resize 50%

9.Paste as new layer and add drop shadow

10.Mirror and move to the top

11.Open ribbon 5 and resize 40%

12.Paste as new layer and add drop shadow

13.Move to the top of the mask

14.Open one of the small bows and resize 30%

15.Paste as new layer and add drop shadow

16.Duplicate several times, place 3 down the long strand of ribbon and the rest randomly round your tag

17.Open one of the flowers and resize 10%

18.Paste as new layer and add drop shadow

19.Duplicate a few times and place around your tag

20.Open your tube and resize if necessary

21.Paste as new layer and add drop shadow

22.Add copyright and watermark

23.Add your name

24.You can merge visible


Hope you enjoyed my tutorial

Friday, June 5, 2009

Sugar Addiction

This tutorial was written by Ivory on 06/03/2009
Do not copy this tutorial and post through any kind of group or claim it as your own. Resemblance to any other tutorial is strictly coincidental.
You will need a tube of your choice.
I am using the art of Ismael Rac which you can purchase HERE

Font of your choice
Scrapkit I used is Lips Like Sugar By Scraps With Attitude and can be purchased HERE

I used this Mask(Just right click and save in your mask folder)

1.Open a new image 500x500 white

2.Open one of the papers in the kit and resize 70%

3.Paste as a new layer on your white

4.Load mask (I have fit to canvas checked) in supplies or one of your choice and merge group

5.Add drop shadow

6.Open the notepad and resize 50%

7.Paste as new layer and add drop shadow

8.Move to the top right

9.Open the wire heart and resize 60%

10.Paste as new layer and add drop shadow

11.Move to the top right

12.Open the gumball machine and resize 20%

13.Paste as new layer and add drop shadow

14.Move to bottom right

15.Open one of the word art and resize 40%

16.Paste as new layer and add drop shadow

17.Move to the notepaper

18.Free rotate 10 to the left

19.Open one of the bows and resize 10%

20.Paste as new layer and add drop shadow

21.Duplicate several times and place around your tag

22.Open one of the flowers and resize 10%

23.Paste as new layer and add drop shadow

24.Duplicate a few times and place around your tag

25.Open one of the lips and resize 10%

26.Paste as new layer and add drop shadow

27.Move to the bottom of the word art

28.Open your tube and resize if necessary

29.Paste as new layer and add drop shadow

30.Move to the left

31.Add copyright and watermark

32.Add your name

33.You can merge visible


Hope you enjoyed my tutorial

Tuesday, June 2, 2009

Groovy

This tutorial was written by Ivory on 06/02/2009Do not copy this tutorial and post through any kind of group or claim it as your own. Resemblance to any other tutorial is strictly coincidental.
You will need a tube of your choice.
I am using the art of Elias Chatzoudis which you can purchase HERE

Font of your choice
Scrapkit I used is Groovylicious By Krissys Scraps and can be purchased HERE

I used this Mask(Just right click and save in your mask folder)

1.Open a new image 500x500 white

2.Open one of the papers in the kit and resize 70%

3.Paste as a new layer on your white

4.Load mask (I have fit to canvas checked) in supplies or one of your choice and merge group

5.Add drop shadow

6.Open the string frame

7.Paste as new layer

8.Select magic wand and click inside the frame

9.Expand by 4

10.Open your close up tube and resize if necessary

11.Paste as new layer

12.Invert/delete/select none

13.Add drop shadow

14.Move tube layer below frame layer

15.Select frame layer and add drop shadow

16.Merge frame layer down with tube layer

17.Highlight mask layer

18.Open one of the painted flowers

19.Paste as new layer and add drop shadow

20.Move to top right

21.Duplicate/mirror/flip

22.Open one of the bows and resize 20%

23.Paste as new layer and add drop shadow

24.Duplicate a few times and place around your tag

25.Open the bracelet and resize 30%

26.Paste as new layer and add drop shadow

27.Move to the lower left of the frame

28.Select the eraser tool and erase the part of the bracelet so it looks looped round the frame

29.Open the decorative wire and resize 60%

30.Paste as new layer and add drop shadow

31.Move to the bottom of the tag

32.Add copyright and watermark

33.Add your name

34.You can merge visible


Hope you enjoyed my tutorial

Flowery

This tutorial was written by Ivory on 06/02/2009
Do not copy this tutorial and post through any kind of group or claim it as your own. Resemblance to any other tutorial is strictly coincidental.

You will need a tube of your choice.
I am using the art of Ismael Rac which you can purchase HERE

Font of your choice
Scrapkit I used is Exceptional by Tammys Scraps and can be purchased HERE

I used this Mask(Just right click and save in your mask folder)

1.Open a new image 500x500 white

2.Open one of the papers in the kit and resize 60%

3.Paste as a new layer on your white

4.Load mask (I have fit to canvas checked) in supplies or one of your choice and merge group

5.Add drop shadow

6.Move down a little

7.Open flower 6

8.Paste as new layer and add drop shadow

9.Open bow 6 and resize 60%

10.Paste as new layer and add drop shadow

11.Move to top right

12.Open one of the bead strings and resize 70%

13.Paste as new layer and add drop shadow

14.Move to the top

15.Open one of the bead necklaces and resize 40%

16.Paste as new layer and add drop shadow

17.Move to the middle of the bow

18.Click on your eraser tool and erase the part of the necklace so it looks like its looped over the bow

19.Open one of the heart pendants and resize 20%

20.Paste as new layer and add drop shadow

21.Move to the bead string

22.Duplicate and place along the bead string

23.Open your tube and resize if necessary

24.Paste as new layer and add drop shadow

25.Move to the left

26.Open one of the twisted ribbons and resize 75%

27.Paste as new layer and add drop shadow

28.Move to the bottom of the tube

29.Add copyright and watermark

30.Add your name

31.You can merge visible


Hope you enjoyed my tutorial

Multicolor

This tutorial was written by Ivory on 06/02/2009
Do not copy this tutorial and post through any kind of group or claim it as your own. Resemblance to any other tutorial is strictly coincidental.
You will need a tube of your choice.
I am using the art of Keith Garvey which you can purchase HERE
Font of your choice
Scrapkit I used is Exceptional by Tammys Scraps and can be purchased HERE
I used this Mask
(Just right click and save in your mask folder)

1.Open a new image 500x500 white

2.Open one of the papers in the kit and resize 60%

3.Paste as a new layer on your white

4.Load mask (I have fit to canvas checked) in supplies or one of your choice and merge group

5.Add drop shadow

6.Move down a little

7.Open doodle 1

8.Paste as new layer and add drop shadow

9.Move to the left

10.Duplicate and mirror

11.Open the rope with flowers

12.Paste as new layer and add drop shadow

13.Open one of the bows and resize 10%

14.Paste as new layer and add drop shadow

15.Duplicate several times and place randomly around your tag

16.Open one of the butterflys and resize 10%

17.Paste as new layer and add drop shadow

18.Duplicate several times and place one on each flower

19.Open your tube and resize if necessary

20.Paste as new layer and add drop shadow

21.Move to the left

22.Open one of the ribbons and resize 70%

23.Paste as new layer and add drop shadow

24.Move to the bottom of the tube

25.Open one of the beadstrings and resize 60%

26.Paste as new layer and add drop shadow

27.Move to the ribbon

24.Add copyright and watermark

25.Add your name

26.You can merge visible


Hope you enjoyed my tutorial


Cherry Cherry

This tutorial was written by Ivory on 06/02/2009
Do not copy this tutorial and post through any kind of group or claim it as your own. Resemblance to any other tutorial is strictly coincidental.

You will need a tube of your choice.
I am using the art of Keith Garvey which you can purchase HERE

Font of your choice
Scrapkit I used is Cherry Karma by Polka Dot Scraps and can be purchased HERE

I used this Mask(Just right click and save in your mask folder)

1.Open a new image 500x500 white

2.Open one of the papers in the kit

3.Paste as a new layer on your white

4.Load mask (I have fit to canvas checked) in supplies or one of your choice and merge group

5.Add drop shadow

6.Open one of the glitters

7.Paste as new layer and add drop shadow

8.Open one of the curly ribbons

9.Paste as new layer and add drop shadow

10.Move to the right

11.Open one of the strings and resize 90%

12.Paste as new layer and add drop shadow

13.Move to the left

14.Open one of the charms and resize 60%

15.Paste as new layer and add drop shadow

16.Move to the top of the string

17.Select the eraser and erase part of the top hoop so it looks like its round the string

18.Open one of the rosebuds and resize 20%

19.Paste as new layer and add drop shadow

20.Duplicate a few times and place randomly around your tag

21.OPen your tube and resize if necessary

22.Paste as new layer and add drop shadow

23.Move to the left

24.Add copyright and watermark

25.Add your name

26.You can merge visible


Hope you enjoyed my tutorial

I Know What You Are

This tutorial was written by Ivory on 06/01/2009
Do not copy this tutorial and post through any kind of group or claim it as your own. Resemblance to any other tutorial is strictly coincidental.
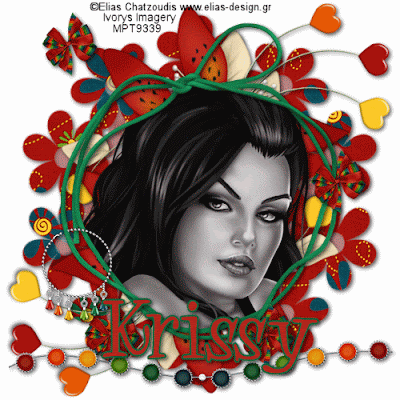
You will need a tube of your choice.
I am using the art of Dark Yarrow which you can purchase HERE

Font of your choice
Scrapkit I used is I know What you are by Kirstys Scraps and can be purchased HERE

I used this Mask(Just right click and save in your mask folder)

1.Open a new image 500x500 white

2.Open one of the papers in the kit and resize 70%

3.Paste as a new layer on your white

4.Load mask (I have fit to canvas checked) in supplies or one of your choice and merge group

5.Open the bracket frame and resize 75%

6.Paste as new layer

7.Open one of the papers and resize 70%

8.Click on your magic wand and click inside the frame

9.Expand by 4

10.Paste paper as new layer

11.Invert/delete/select none

12.Move paper layer down below frame layer

13.Using your magic wand again click inside the frame again and expand by 4

14.Open your close up tube and resize if necessary

15.Paste as new layer

16.Invert/delete/select none

17.Move tube layer below frame

18.Highlight frame layer and add drop shadow

19.Merge frame layer down with tube layer and again with paper layer

20.Now you should have them all on one layer

21.With this layer highlighted click on the eye in your layer palette to close the layer while we work underneath it

22.Highlight the mask layer

23.Open one of the glitter circles

24.Paste as new layer and add drop shadow

25.Open ribbon 3 and resize 80%

26.Paste as new layer and add drop shadow

27.Move to the bottom of the tag

28.Click on the eye of the frame layer to reshow it and highlight this layer

29.Open ribbon 6 and resize 80%

30.Paste as new layer and add drop shadow

31.Move to the right side of the frame

32.OPen flower 3 and resize 40%

33.Paste as new layer and add drop shadow

34.Move to the bottom right and duplicate til you have 3 and arrange in a cluster

35.OPen the glass heart and resize 40%

36.Paste as new layer and add drop shadow

37.Move to the center of the cluster

38.Open one of the buttons and resize 20%

39.Paste as new layer and add drop shadow

40.Move to the center of the heart

41.Open the diamond

42.Paste as new layer and move to the top center of the frame

43.Open the light sparkles

44.Paste as new layer and move to the center of the diamond

45.Add copyright and watermark

46.Add your name

47.You can merge visible


Hope you enjoyed my tutorial