Tuesday, March 31, 2009

Girls Rule

This tutorial was written by Ivory on 03/31/2009
Do not copy this tutorial and post through any kind of group or claim it as your own. Resemblance to any other tutorial is strictly coincidental.

This tutorial uses no filters
You will need a tube of your choice.
I am using the art of Armando Huerta which you can purchase HERE

Font of your choice
Scrapkit I used is Girls Rule Made By Justine and can be purchased HERE

I used this Mask(Just right click and save in your mask folder)


1.Open a new image 500x500 white

2.Open one of the papers in the kit and resize 80%

3.Paste as a new layer on your white

4.Load mask (I have fit to canvas checked) in supplies or one of your choice and merge group

5.Add slight drop shadow

6.Open one of the glitterswirls

7.Paste as new layer and add drop shadow

8.Open one of the foam flower stickers and resize 20%

9.Paste as new layer and add drop shadow

10.Duplicate til you have one for every other spoke of the mask

11.Open one of the brads and resize 30%

12.Paste as new layer and add drop shadow

13.Duplicate until you have one for each of the other spokes of the mask

14.Open one of the butterflys and resize 20%

15.Paste as new layer and add drop shadow

16.Duplicate and place one at the top right and one at bottom left

17.Open one of the word art and resize 85%

18.Paste as new layer and add drop shadow

19.Move to the top

20.Open your tube and resize if necessary

21.Paste as new layer and add drop shadow

22.Add copyright and watermark

23.Add your name

24.Merge visible


Hope you enjoyed my tutorial


Fairy Dust

This tutorial was written by Ivory on 03/31/2009
Do not copy this tutorial and post through any kind of group or claim it as your own. Resemblance to any other tutorial is strictly coincidental.

This tutorial uses no filters
You will need a tube of your choice.
I am using the art of Elias Chatzoudis which you can purchase HERE

Font of your choice
Scrapkit I used is Stardust By Annie's Designs and can be purchased HERE

I used this Mask(Just right click and save in your mask folder)
1.Open a new image 500x500 white

2.Open one of the papers in the kit and resize 80%

3.Paste as a new layer on your white

4.Load mask (I have fit to canvas checked) in supplies or one of your choice and merge group

5.Add slight drop shadow

6.Open one of the starframes

7.Paste as new layer and add drop shadow

8.Move to the top left

9.Duplicate and move to the bottom right

10.Open one of the wands and resize 50%

11.Paste as new layer and add drop shadow

12.Free rotate to the right 15

13.Duplicate and mirror

14.Place them as crossed on the top right

15.Open one of the flowers and resize 10%

16.Paste as new layer and add drop shadow

17.Duplicate several times and place randomly on your tag

18.Place one of them one the crossed wands

19.Open your tube and resize if necessary

20.Paste as new layer and add drop shadow

21.Open the fairy and resize 30%

22.Paste as new layer and add drop shadow

23.Move so she is balancing on the tube's finger

24.Add copyright and watermark

25.Add your name

26.Merge visible


Hope you enjoyed my tutorial


Monday, March 30, 2009

Talk to the Hand

This tutorial was written by Ivory on 03/30/2009
Do not copy this tutorial and post through any kind of group or claim it as your own. Resemblance to any other tutorial is strictly coincidental.

This tutorial uses no filters
You will need a tube of your choice.
I am using the art of Elias Chatzoudis which you can purchase HERE

Font of your choice
Scrapkit I used is Whatever! (Tagger) By Ivorys Designz and can be purchased HERE

Wordart is free and can be downloaded HERE

I used this Mask(Just right click and save in your mask folder)

1.Open a new image 500x500 white

2.Open one of the papers in the kit and resize 70%

3.Paste as a new layer on your white

4.Load mask (I have fit to canvas checked) in supplies or one of your choice and merge group

5.Add slight drop shadow

6.Open one of the lips and resize 40%

7.Paste as new layer and add drop shadow

8.Move to the top right

9.Duplicate and move to the bottom left

10.Open one of the flowers and resize 20%

11.Paste as new layer and add drop shadow

12.Duplicate several times and place randomly round your tag

13.Open one of the stars and resize 20%

14.Paste as new layer and add drop shadow

15.Duplicate several times and place randomly round your tag

16.Open one of the bows and resize 20%

17.Paste as new layer and add drop shadow

18.Duplicate several times and place randomly on your tag

19.Open one of the wordart and resize 10%

20.Paste as new layer and add drop shadow

21.Move to the top right lips

22.Open your tube and resize if necessary

23.Paste as new layer and add drop shadow

24.Open one of the worded ribbons and resize 50%

25.Paste as new layer and add drop shadow

26.Move to the base of the tube

27.Add copyright and watermark

28.Add your name

29.Merge visible


Hope you enjoyed my tutorial


Thursday, March 26, 2009

Juicy Fruit

This tutorial was written by Ivory on 03/26/2009
Do not copy this tutorial and post through any kind of group or claim it as your own. Resemblance to any other tutorial is strictly coincidental.

This tutorial uses no filters
You will need a tube of your choice.
I am using the art of Eugene Rzhevskii which you can purchase HERE

Font of your choice
Scrapkit I used is Citrus Blaze By Lisa's Designs and can be purchased HERE

I used this Mask(Just right click and save in your mask folder)
1.Open a new image 500x500 white

2.Open one of the papers in the kit

3.Paste as a new layer on your white

4.Load mask (I have fit to canvas checked) in supplies or one of your choice and merge group

5.Add slight drop shadow

6.Open one of the flowerclusters

7.Paste as new layer and add drop shadow

8.Move to the top right

9.Duplicate and mirror and move together so they overlap

10.Open one of the flowers and resize 20%

11.Paste as new layer and add drop shadow

12.Duplicate several times and place randomly round your tag

13.Open one of the bows and resize 30%

14.Paste as new layer and add drop shadow

15.Duplicate several times and place randomly round your tag

16.Open one of the butterflys and resize 20%

17.Paste as new layer and add drop shadow

18.Duplicate and place randomly on your tag

19.Open tube of your choice and resize if necessary

20.Paste as new layer and add drop shadow

21.Add copyright and watermark

22.Add your name

23.Merge visible


Hope you enjoyed my tutorial


Forest Chick

This tutorial was written by Ivory on 03/26/2009
Do not copy this tutorial and post through any kind of group or claim it as your own. Resemblance to any other tutorial is strictly coincidental.

This tutorial uses no filters
You will need a tube of your choice.
I am using the art of Ismael Rac which you can purchase HERE

Font of your choice
Scrapkit I used is Citrus Blaze By Lisa's Designs and can be purchased HERE

I used this Mask(Just right click and save in your mask folder)

1.Open a new image 500x500 white

2.Open one of the papers in the kit

3.Paste as a new layer on your white

4.Load mask (I have fit to canvas checked) in supplies or one of your choice and merge group

5.Add slight drop shadow

6.Open one of the frames and resize 80%

7.Paste as new layer and add drop shadow

8.Move down

9.Open one of the brads and resize 20%

10.Paste as new layer and add drop shadow

11.Duplicate several times and place randomly around your tag

12.Open one of the flowers and resize 20%

13.Paste as new layer and add drop shadow

14.Duplicate several times and place randomly round your tag

15.Open one of the bows and resize 30%

16.Paste as new layer and add drop shadow

17.Move to the top left corner of the frame

18.Duplicate and mirror

19.Open one of the dragonflys and resize 20%

20.Paste as new layer and add drop shadow

21.Duplicate and place both in places of your choice

22.Open tube of your choice and resize if necessary

23.Paste as new layer and add drop shadow

24.Move base of the frame

25.Open one of the folded ribbons and resize 40%

26.Paste as new layer and add drop shadow

27.Move to the of the frame

28.Duplicate and mirror

29.Add copyright and watermark

30.Add your name

31.Merge visible


Hope you enjoyed my tutorial


Tuesday, March 24, 2009

A Dash Of Red

This tutorial was written by Ivory on 03/24/2009
Do not copy this tutorial and post through any kind of group or claim it as your own. Resemblance to any other tutorial is strictly coincidental.

This tutorial uses no filters
You will need a tube of your choice.
I am using the art by Elias Chatzoudis you can purchase his tubes HERE

Font of your choice
Scrapkit I used is 2 Emo 4 U By Eclipse's Creations and can be purchased HERE

I used this Mask(Just right click and save in your mask folder)


1.Open a new image 500x500 white

2.Open one of the papers in the kit and resize by 80%

3.Paste as a new layer on your white

4.Load mask (I have fit to canvas checked) in supplies or one of your choice and merge group

5.Add slight drop shadow

6.Open one of the acrylic stars

7.Paste as new layer and add drop shadow

8.Place on the left

9.Open one of the chrome swirls

10.Paste as new layer and add drop shadow

11.Move to the top right

12.Duplicate and flip

13.Open one of the buttons and resize 30%

14.Paste as new layer and add drop shadow

15.Duplicate several times and place randomly round your tag

16.Open one of the brads and resize 30%

17.Paste as new layer and add drop shadow

18.Duplicate several times and place randomly round your tag

19.Open one of the butterflys and resize 30%

20.Paste as new layer and add drop shadow

21.Duplicate and mirror

22.Place one on each of the chrome swirls

23.Merge visible

24.Add copyright and watermark

25.Add your name


Hope you enjoyed my tutorial


Monday, March 23, 2009

Glittered


This tutorial was written by Ivory on 03/23/2009
Do not copy this tutorial and post through any kind of group or claim it as your own. Resemblance to any other tutorial is strictly coincidental.

This tutorial uses no filters
You will need a tube of your choice.
I am using the art of Jose Cano which you can purchase HERE

Font of your choice
Scrapkit I used is Butterfly Heaven By ChaDesignz and can be purchased HERE

I used this Mask(Just right click and save in your mask folder)


1.Open a new image 500x500 white

2.Open one of the papers in the kit and resize 80%

3.Paste as a new layer on your white

4.Load mask (I have fit to canvas checked) in supplies or one of your choice and merge group

5.Add slight drop shadow

6.Open crystal curtain and resize 255

7.Paste as new layer and add drop shadow

8.Move to the top of the mask square

9.Open the tassel and resize 60%

10.Paste as new layer and add drop shadow

11.Move to the top right corner

12.Open the pearl jewel and resize 20%

13.Paste as new layer and add drop shadow

14.Move to the bottom of the loop of the tassel

15.Open the jewel branch and resize 20%

16.Paste as new layer and add drop shadow

17.Move to the bottom right corner

18.Duplicate and mirror

19.Duplicate this layer and flip

20.Open your tube and resize if necessary

21.Paste as new layer and add drop shadow

22.Open the jeweled border and resize 40%

23.Paste as new layer and add drop shadow

24.Move to the bottom

25.Open one of the swirled ribbons and reszie 40%

26.Paste as new layer and add drop shadow

27.Move to the bottom so it overlaps the jewel border a little

28.Open one of the butterflys and resize 10%

29.Paste as new layer and add drop shadow

30.Move to one end of the jewel border

31.Duplicate and mirror

32.Open one of the buttons and resize 20%

33.Paste as new layer and add drop shadow

34.Duplicate several times and place randomly round your tag

35.Add copyright and watermark

36.Add your name

37.Merge visible


Hope you enjoyed my tutorial


Pretty Easter

This tutorial was written by Ivory on 03/23/2009
Do not copy this tutorial and post through any kind of group or claim it as your own. Resemblance to any other tutorial is strictly coincidental.

This tutorial uses no filters
You will need a tube of your choice.
I am using the art of Elias Chatzoudis which you can purchase HERE

Font of your choice
Scrapkit I used is Easter Egg Hunt By Gemini Creationz and can be purchased HERE

I used this Mask(Just right click and save in your mask folder)

1.Open a new image 500x500 white

2.Open one of the papers in the kit and resize 70%

3.Paste as a new layer on your white

4.Load mask (I have fit to canvas checked) in supplies or one of your choice and merge group

5.Open the wreath and resize 75%

6.Paste as new layer and add drop shadow

7.Select the magic wand and click inside the wreath

8.Expand by 5

9.Open your close up and resize if necessary

10.Paste as new layer, selections/invert/delete/select none

11.Add drop shadow to tube

12.Move the tube frame below the wreath layer

13.Open the bead string and resize 45%

14.Paste as new layer and add drop shadow

15.Move down

16.Open the egg flower and resize 10%

17.Paste as new layer and add drop shadow

18.Duplicate several times and place one at each end of the beadstring and the others randomly round your tag

19.Open one of the eggs and resize 10%

20.Paste as new layer and add drop shadow

21.Duplicate several times and place randomly round your tag

32.Add copyright and watermark

33.Add your name

34.Merge visible


Hope you enjoyed my tutorial


Saturday, March 21, 2009

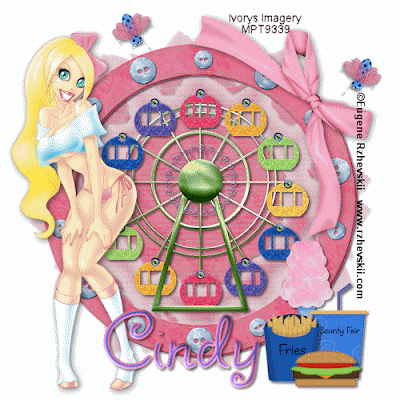
Fun Fair


This tutorial was written by Ivory on 03/21/2009


Do not copy this tutorial and post through any kind of group or claim it as your own. Resemblance to any other tutorial is strictly coincidental.


This tutorial uses no filters


You will need a tube of your choice.


I am using the art of Eugene Rzhevskii which you can purchase HERE


Font of your choice


Scrapkit I used is Kotton Kandy Kisses by Scrappin With Lil Ole Me and can be purchased HERE


I used this Mask(Just right click and save in your mask folder)


1.Open a new image 500x500 white


2.Open one of the papers in the kit and resize 70%


3.Paste as a new layer on your white


4.Load mask (I have fit to canvas checked) in supplies or one of your choice and merge group


5.Open the frame and resize 80%


6.Paste as new layer and add drop shadow


7.Open one of the bows and resize 60%


8.Paste as new layer and add drop shadow


9.Move to the top right of the frame


10.Open the ferris wheel and resize 50%


11.Paste as new layer and add drop shadow


12.Open the cotton candy and resize 30%


13.Paste as new layer and add drop shadow


14.Move to the bottom right


15.Open the drink and resize 30%


16.Paste as new layer and add drop shadow


17.Move to the bottom right


18.Open the fries and resize 20%


19.Paste as new layer and add drop shadow


20.Move to the bottom right


21.Open the burger and resize 30%


22.Paste as new layer and add drop shadow


23.Move to the bottom right


24.Open one of the bugs and resize 20%


25.Paste as new layer and add drop shadow


26.Move to the top left of your tag


27.Duplicate and mirror


28.Move down to the right side a little


29.Open your tube and resize if necessary


30.Paste as new layer and add drop shadow


31.Move to the left


32.Add copyright and watermark


33.Add your name


34.Merge visible


Hope you enjoyed my tutorial


Thursday, March 19, 2009

Turquoise Temptress

This tutorial was written by Ivory on 03/19/2009
Do not copy this tutorial and post through any kind of group or claim it as your own. Resemblance to any other tutorial is strictly coincidental.

This tutorial uses no filters
You will need a tube of your choice.
I am using the art of Ismael Rac which you can purchase HERE

Font of your choice
Scrapkit I used is Easy Breezy by Crazy Lady Scraps and can be purchased HERE

I used this Mask(Just right click and save in your mask folder)

1.Open a new image 500x500 white

2.Open one of the papers in the kit and resize 70%

3.Paste as a new layer on your white

4.Load mask (I have fit to canvas checked) in supplies or one of your choice and merge group

5.Open one of the doodles

6.Paste as new layer and add drop shadow

7.Move to the top right of the tag

8.Duplicate and mirror

9.Open one of the oval frames

10.Paste as new layer and add drop shadow

11.Move to the bottom of the tag

12.Open one of the flowers and resize 50%

13.Paste as new layer and add drop shadow

14.Duplicate and mirror

15.Move both to the top middle

16.Open one of the feathers and resize 20%

17.Paste as new layer and add drop shadow

18.Duplicate and mirror

19.Move both to the flower arrangement

20.Open another flower and resize 30%

21.Paste as new layer and add drop shadow

22.Move to the middle of the flower arrangement

23.Open one of the butterflys and resize 20%

24.Paste as new layer and add drop shadow

25.Duplicate and place either side of the frame

26.Open your tube and resize if necessary

27.Paste as new layer and add drop shadow

28.Move to the bottom over the frame

29.Add copyright and watermark

30.Add your name

31.Merge visible


Hope you enjoyed my tutorial


Sunrise Sprites

This tutorial was written by Ivory on 03/19/2009
Do not copy this tutorial and post through any kind of group or claim it as your own. Resemblance to any other tutorial is strictly coincidental.

This tutorial uses no filters
You will need a tube of your choice.
I am using the art of Joanna Bromley which you can purchase HERE

Font of your choice
Scrapkit I used is Mountain Sunrise by Crazy Lady Scraps and can be purchased HERE

I used this Mask(Just right click and save in your mask folder)
1.Open a new image 500x500 white

2.Open one of the papers in the kit and resize 70%

3.Paste as a new layer on your white

4.Load mask (I have fit to canvas checked) in supplies or one of your choice and merge group

5.Open the bridge and resize 60%

6.Paste as new layer and add drop shadow

7.Move to the bottom of your tag

8.Open your tube and resize if Necessary

9.Paste as new layer and add drop shadow

10.Open one of the butterflys and resize 10%

11.Paste as new layer and add drop shadow

12.Duplicate a few times and place randomly round your tag

13.Open a different butterfly and resize 10%

14.Paste as new layer and add drop shadow

15.Duplicate a few times and place randomly round your tag

16.Open one of the flowers and resize 10%

17.Paste as new layer and add drop shadow

18.Duplicate a few times and place randomly round your tag

19.Open a different flower and resize 10%

20.Paste as new layer and add drop shadow

21.Duplicate a few times and place randomly round your tag

22.Add copyright and watermark

23.Add your name

24.Merge visible


Hope you enjoyed my tutorial


Framed In Silver

This tutorial was written by Ivory on 03/19/2009
Do not copy this tutorial and post through any kind of group or claim it as your own. Resemblance to any other tutorial is strictly coincidental.

This tutorial uses no filters
You will need a tube of your choice.
I am using the art of Elias Chatzoudis which you can purchase HERE

Font of your choice
Scrapkit I used is Ooh October by Kirsty Scraps and can be purchased HERE

I used this Mask(Just right click and save in your mask folder)

1.Open a new image 500x500 white

2.Open one of the papers in the kit and resize 70%

3.Paste as a new layer on your white

4.Load mask (I have fit to canvas checked) in supplies or one of your choice and merge group

5.Open the bracket frame and resize 70%

6.Paste as new layer

7.Click on the magic wand and click inside the frame

8.Expand by 5

9.Open your close up resize if necessary

10.Paste as new layer , Selection/invert/delete/select none

11.Move the tube layer below the frame layer

12.Highlight frame layer and merge down with tube

13.Add drop shadow

14.Open the heart string

15.Paste as new layer and add drop shadow

16.Move to the right

17.Open one of the leaf sprays and resize 40%

18.Paste as new layer and add drop shadow

19.Move to the bottom right

20.Open one of the greenery and resize 40%

21.Paste as new layer and add drop shadow

22.Move to the top left

23.Open one of the fabric hearts and resize 10%

24.Paste as new layer and add drop shadow

25.Duplicate several times and place randomly round your tag

26.Open the dangly charm and resize 50%

27.Paste as new layer and add drop shadow

28.Move to the top left with the greenery

29.Open one of the bows and resize 10%

30.Paste as new layer and add drop shadow

31.Duplicate a few times and place one on the leaf spray and the rest of a few of the fabric hearts

32.Add copyright and watermark

33.Add your name

34.Merge visible


Hope you enjoyed my tutorial


Blue Mermaid

Cant Upload Animation without it cutting it off some
so you can see the animation HERE
This tutorial was written by Ivory on 03/18/2009
Do not copy this tutorial and post through any kind of group or claim it as your own. Resemblance to any other tutorial is strictly coincidental.

This tutorial uses no filters
You will need a tube of your choice.
I am using the art of Ismael Rac which you can purchase HERE

Font of your choice
Scrapkit I used is Ooh October by Kirsty Scraps and can be purchased HERE

I used this Mask(Just right click and save in your mask folder)

1.Open a new image 500x500 white

2.Open one of the papers in the kit and resize 70%

3.Paste as a new layer on your white

4.Load mask (I have fit to canvas checked) in supplies or one of your choice and merge group

5.Add slight drop shadow

6.Open the glitter bling and resize 98%

7.Paste as new layer

8.Open doodle 1 and resize 85%

9.Paste as new layer and add drop shadow

10.Move to the top

11.open one of the strings and resize 95%

12.Paste as new layer and add drop shadow

13.Move to the bottom

14.Open the gem heart

15.Paste as new layer and add drop shadow

16.Move to the top left

17.Open the feather and resize 40%

18.Paste as new layer and add drop shadow

19.Move to the top left,duplicate and mirror, arrange so the tips meet

20.Hightlight heart gem layer and move up over the feather layers

21.Open the dangly charm and resize 40%

22.Paste as new layer and add drop shadow

23.Move to the top right so the tip is on the tip of the doodle

24.Open one of the bows and resize 20%

25.Paste as new layer and add drop shadow

26.Move to the tip of the dangly charm

27.Open your tube and resize if necessary

28.Paste asn new layer and add drop shadow

29.Move to the bottom of the tag

30.Add copyright and watermark

31.Add your name

31.Merge visible or continue for animation

ANIMATION OPTIONAL

32.Open animation shop

33.Highlight Bling layer

34.Duplicate twice

35.Highlight bottom Bling layer

36.Adjust/add noise/Uniform checked/Monochrome checked/ Noise 45%/press ok

37.Highlight middle Bling layer

38.Adjust/add noise/Uniform checked/Monochrome checked/ Noise 40%/press ok

39.Highlight top Bling layer

40.Adjust/add noise/Uniform checked/Monochrome checked/ Noise 35%/press ok

41.Close out the top 2 Bling layers

42.Edit/copy merged

43.Paste in animation shop

44.Back to Paint shop and close out the bottom layer and open middle layer

45.Copy merged,return to animation shop

46.Edit/paste/after current frame

47.Back to paint shop and close out middle layer and open top layer

48.Copy Merged and return to animation shop

49.Edit/paste/after current frame

50.View/Animation

50.Save animation


Hope you enjoyed my tutorial


Wednesday, March 18, 2009

Smoulder

This tutorial was written by Ivory on 03/17/2009
Do not copy this tutorial and post through any kind of group or claim it as your own. Resemblance to any other tutorial is strictly coincidental.

This tutorial uses no filters
You will need a tube of your choice.
I am using the art of Keith Garvey which you can purchase HERE

Font of your choice
Scrapkit I used is The Saga, The Beginning (Tagger)By Pimpd Tagz and can be purchased HERE

I used this Mask(Just right click and save in your mask folder)

1.Open a new image 500x500 white

2.Open one of the papers in the kit

3.Paste as a new layer on your white

4.Load mask (I have fit to canvas checked) in supplies or one of your choice and merge group

5.Add drop shadow

6.Open the circle frame and resize 75%

7.Paste as new layer

8.Click on your magic wand and click inside the frame

9.Selections/expand by 5

10.Open your close up and resize if necessary

11.Paste as new layer

12.Selections/invert/delete/select none

13.Move the tube layer down below the frame layer

14.Highlight frame layer and add drop shadow

15.Merge frame down with tube

16.The dazzle and resize 50%

17.Paste as new layer and add drop shadow

18.Duplicate several times and place all the way round the edge of the frame layer

19.When done, move the frame layer to the top

20.Open one of the leaf sprigs and resize 60%

21.Paste as new layer and add drop shadow

22.Mirror and flip and place in top right corner

23.Bring frame layer to the top again

24.Open one of the flowers and resize 20%

25.Paste as new layer and add drop shadow

26.Duplicate twice and place at the top right by the leaf, around the frame

27.Add copyright and watermark

28.Add your name

29.Merge visible
Hope you enjoyed My Tutorial

Saturday, March 14, 2009

Eastern Promise

Cant put animated images here for some reason
you can see the animated version HERE
This tutorial was written by Ivory on 03/14/2009
Do not copy this tutorial and post through any kind of group or claim it as your own. Resemblance to any other tutorial is strictly coincidental.

This tutorial uses no filters
You will need a tube of your choice.
I am using the art of Elias Chatzoudis which you can purchase HERE

Font of your choice
Scrapkit I used is Royal Rajah (tagger) By Ivorys Designz and can be purchased HERE

I used this Mask(Just right click and save in your mask folder)

1.Open a new image 500x500 white

2.Open one of the papers in the kit and resize by 70%

3.Paste as a new layer on your white

4.Load mask (I have fit to canvas checked) in supplies or one of your choice and merge group

5.Add drop shadow

6.Open your close up tube and resize if necessary

7.Paste as new layer and fade out to 61

8.Open one of the gems and resize 20%

9.Paste as new layer and add drop shadow

10.Duplicate til you have 4

11.Place one on each corner of the mask

12.Open one of the beaded curtains and resize 50%

13.Paste as new layer and add drop shadow

14.Place at the top edge of the mask

15.Move the curtain layer down below the gem layers

16.Open one of the bead danglys

17.Paste as new layer and add drop shadow

18.Move to the left spoke of the mask

19.Open one of the flowers and resize 20%

20.Paste as new layer and add drop shadow

21.Duplicate til you have enough for each spoke of the mask except the ones with the dangly on

22.Open one of the stars and resize 20%

23.Paste as new layer and add drop shadow

24.Duplicate several times and place randomly round your tag

25.Open one of the sequins and resize 30%

26.Paste as new layer and add drop shadow

27.Duplicate several times and place randomly round your tag

28.Add copyright and watermark

29.Add your name

30.You can merge visible here or carry on for animated version

Animation optional

31.Open animation shop

32.Highlight beaded curtain layer

33.Duplicate twice

34.Highlight bottom beaded curtain layer

35.Adjust/add noise/Uniform checked/Monochrome checked/ Noise 45%/press ok

36.Highlight middle beaded curtain layer

37.Adjust/add noise/Uniform checked/Monochrome checked/ Noise 40%/press ok

38.Highlight top beaded curtain layer

39.Adjust/add noise/Uniform checked/Monochrome checked/ Noise 35%/press ok

40.Close out the top 2 curtain layers

41.Edit/copy merged

42.Paste in animation shop

43.Back to Paint shop and close out the bottom layer and open middle layer

44.Copy merged,return to animation shop

45.Edit/paste/after current frame

46.Back to paint shop and close out middle layer and open top layer

47.Copy Merged and return to animation shop

48.Edit/paste/after current frame

49.View/Animation

50.Save animation


Hope you enjoyed my tutorial

Sapphire Beauty

This tutorial was written by Ivory on 03/14/2009
Do not copy this tutorial and post through any kind of group or claim it as your own. Resemblance to any other tutorial is strictly coincidental.

This tutorial uses no filters
You will need a tube of your choice.
I am using the art by Ismael Rac you can purchase his tubes HERE

Font of your choice
Scrapkit I used is Sapphire Grunge by Scrapz A Daisy and can be purchased HERE
1.Open a new image 500x500 white

2.Open the doodle frame and resize 90%

3.Paste as a new layer and add drop shadow

4.Open one of the frames and resize 85%

5.Paste as new layer

6.Select your magic wand and click inside the frame expand by 8

7.Open one of the papers and resize 80%

8.Paste as new layer /invert/delete/select none

9.Move paper layer below frame layer

10.Add drop shadow to frame and merge down with paper

11.Open one of the glitters

12.Paste as new layer and add drop shadow

13.Move to the top left corner

14.Open one of the flowers and resize 20%

15.Paste as new layer and add drop shadow

16.Duplicate til you have 4 and place one on each corner of the frame

17.Open one of the jewels and resize 10%

18.Paste as new layer and add drop shadow

19.Duplicate til you have 4 and paste at the top middle and bottom of each side of the frame

20.Open one of the bows and resize 10%

21.Paste as new layer and add drop shadow

22.Mirror and move to the top inside right corner of the frame

23.Open your tube and resize if necessary

24.Paste as new layer and add drop shadow

25.Merge Visible

26.Add copyright and watermark

27.Add your name


Hope you enjoyed my tutorial

Boys Toys

This tutorial was written by Ivory on 03/14/2009

Do not copy this tutorial and post through any kind of group or claim it as your own. Resemblance to any other tutorial is strictly coincidental.


This tutorial uses no filters


You will need a tube of your choice.


I am using the art of Eddie Holly which you can purchase HERE


Font of your choice


Scrapkit I used is Boyish Bliss By Crazy Lady Scraps and can be purchased HERE


I used this Mask(Just right click and save in your mask folder)

1.Open a new image 500x500 white

2.Open one of the papers in the kit and resize by 80%

3.Paste as a new layer on your white

4.Load mask (I have fit to canvas checked) in supplies or one of your choice and merge group

5.open one of the bracket pads and resize 70%

6.Paste as new layer and add drop shadow

7.Free rotate to the left 10

8.Open one of the boxes and resize 60%

9.Paste as new layer and add drop shadow

10.Open one of the buckles and resize 20%

11.Paste as new layer and add drop shadow

12.Duplicate and place one on each end of the top of the box

13.Open one of the buttons and resize 20%

14.Paste as new layer and add drop shadow

15.Duplicate til you have 4

16.Place one on each corner of the bracket pad

17.Open one of the eyelet ribbons and resize 30%

18.Paste as new layer and add drop shadow

19.Place on the right of the bracket pad

20.Duplicate and mirror and move up

21.Click on your text tool and write text of your choice in the box

22.Open your tube and resize if necessary

23.Paste as new layer and add drop shadow, move down

24.Merge Visible

25.Add copyright and watermark

26.Add your name


Hope you enjoyed my tutorial


Go Go Green

This tutorial was written by Ivory on 03/14/2009
Do not copy this tutorial and post through any kind of group or claim it as your own. Resemblance to any other tutorial is strictly coincidental.

This tutorial uses no filters
You will need a tube of your choice.
I am using the Poser made by Only Jo Posers Which are free

Font of your choice
Scrapkit I used is Retro A GoGo By Eclipse Creations and can be purchased HERE

I used this Mask(Just right click and save in your mask folder)

1.Open a new image 500x500 white

2.Open one of the papers in the kit and resize by 80%

3.Paste as a new layer on your white

4.Load mask (I have fit to canvas checked) in supplies or one of your choice and merge group

5.Add drop shadow

6.Open one of the frames

7.Paste as new layer and add drop shadow

8.Move to the top right

9.Duplicate and move to the bottom left

10.Open one of the flower charms and place at the top center of one of the frames

11.Using your eraser,carefully erase part of the hook so it looks like its hanging over the frame

12.Duplicate and move to the other frame

13.Open your tube and resize if necessary

14.Paste as new layer and add drop shadow

15.Open one of the ribbons and resize 35%

16.Paste as new layer and add drop shadow

17.Move to the bottom of the tube

18.Open one of the doodles

19.Paste as new layer and add drop shadow

20.Move to the bottom, over the ribbon

21.Open one of the flowers and resize 10%

22.Paste as new layer and add drop shadow

23.Duplicate several times and place one at each end of the ribbon and the others randomly round your tag

24.Merge Visible

25.Add copyright and watermark

26.Add your name


Hope you enjoyed my tutorial

Hard Rock

This tutorial was written by Ivory on 03/13/2009
Do not copy this tutorial and post through any kind of group or claim it as your own. Resemblance to any other tutorial is strictly coincidental.

This tutorial uses no filters
You will need a tube of your choice.
I am using the art by Ismael Rac you can purchase his tubes HERE

Font of your choice
Scrapkit I used is Upside Down By Vassia's Designs and can be purchased HERE

I used this Mask(Just right click and save in your mask folder)
1.Open a new image 500x500 white

2.Open one of the papers in the kit and resize by 80%

3.Paste as a new layer on your white

4.Load mask (I have fit to canvas checked) in supplies or one of your choice and merge group

5.Add drop shadow

6.Open the barbed wire

7.Paste as new layer and add drop shadow

8.Move to the top right

9.Open one of the flowers and resize 10%

10.Paste as new layer and add drop shadow

11.Duplicate several times and place randomly around your tag

12.Open one of the gems and resize 30%

13.Paste as new layer and add drop shadow

14.Duplicate several times and place randomly around your tag

15.Open one of the skulls

16.Paste as new layer and add drop shadow

17.move to the bottom right of the mask

18.Open your tube and resize if necessary

19.Paste as new layer and add drop shadow

20.Move to the left

21.Open one of the ribbon wraps and resize 65%

22.Paste as new layer and add drop shadow

23.Move to the bottom

24.Merge Visible

25.Add copyright and watermark

26.Add your name


Hope you enjoyed my tutorial
Thursday, March 12, 2009

This Aint No Reservation

This tutorial was written by Ivory on 03/12/2009
Do not copy this tutorial and post through any kind of group or claim it as your own. Resemblance to any other tutorial is strictly coincidental.

This tutorial uses no filters
You will need a tube of your choice.
I am using the art by Elias Chatzoudis you can purchase his tubes HERE

Font of your choice
Scrapkit I used is Starlight Ranch By CJ's Dreams and can be purchased HERE

I used this Mask(Just right click and save in your mask folder)

1.Open a new image 500x500 white

2.Open one of the papers in the kit and resize by 16%

3.Paste as a new layer on your white

4.Load mask (I have fit to canvas checked) in supplies or one of your choice and merge group

5.Add Drop shadow and move down

6.Open the wagon wheel and resize 20%

7.Paste as new layer and add drop shadow

8.Open the grass flowers and resize 11%

9.Paste as new layer and add drop shadow

10.Move to the base of the mask

11.Open the lampost and resize 13%

12.Paste as new layer and add slight drop shadow

13.Move to the far right

14.Open the boots and resize 8%

15.Paste as new layer and add drop shadow

16.Move to the base of the lampost

17.Open the hat and resize 6%

18.Paste as new layer and add drop shadow

19.Move to the boots

20.Open the star doorknocker and resize 8%

21.Paste as new layer and add drop shadow

22.Move to the middle of the wheel

23.Open one of the flowers and resize 10%

24.Paste as new layer and add drop shadow

25.Duplicate twice and place each one of the wheel on the top 3 spokes

26.Open your tube and resize if necessary

27.Paste as new layer add drop shadow

28.Move to the left

31.Merge Visible

32.Add copyright and watermark

33.Add your name


Hope you enjoyed my tutorial

Blue Cowgirl

This tutorial was written by Ivory on 03/12/2009
Do not copy this tutorial and post through any kind of group or claim it as your own. Resemblance to any other tutorial is strictly coincidental.

This tutorial uses no filters
You will need a tube of your choice.
I am using the art by Elias Chatzoudis you can purchase his tubes HERE

Font of your choice
Scrapkit I used is Breathless By Simply Irresistable and can be purchased HERE

I used this Mask(Just right click and save in your mask folder)

1.Open a new image 500x500 white

2.Open one of the papers in the kit and resize by 70%

3.Paste as a new layer on your white

4.Load mask (I have fit to canvas checked) in supplies or one of your choice and merge group

5.Open one of the flowers and resize 40%

6.Paste as new layer add drop shadow

7.Duplicate several times and place randomly round your tag

8.Open the frame and resize 80%

9.Paste as new layer

10.Select magic wand and click inside the frame expand by 4

11.Open another paper and resize 60%

12.Paste as new layer then selections/invert/delete/select none

13.Move paper layer below frame layer

14.Select frame layer and merge down

15.Add drop shadow

16.Open one of the bows and resize 20%

17.Paste as new layer and add drop shadow

18.Duplicate 2 times and place these bows along the left edge of the frame

19.Open one of the bugs and resize 20%

20.Paste as new layer and add drop shadow

21.Place on the curtain

22.Duplicate and mirror and move this one down a little

23.Open your tube and resize if necessary

24.Paste as new layer add drop shadow

25.Open one of the ruffled ribbons and resize 60%

26.Paste as new layer and add drop shadow

27.Move to the base of the tube

28.Open one of the brads and resize 60%

29.Paste as new layer and add drop shadow

30.Duplicate and place each one on each end of the ruffle

31.Merge Visible

32.Add copyright and watermark

33.Add your name


Hope you enjoyed my tutorial


Tuesday, March 10, 2009

Brunettes

This tutorial was written by Ivory on 03/09/2009
Do not copy this tutorial and post through any kind of group or claim it as your own. Resemblance to any other tutorial is strictly coincidental.

This tutorial uses no filters
You will need a tube of your choice.
I am using the art by Elias Chatzoudis you can purchase his tubes HERE

Font of your choice
Scrapkit I used is Its All About Flowers by Swheat Creations and can be purchased HERE

I used this Mask(Just right click and save in your mask folder)
1.Open a new image 500x500 white

2.Open one of the papers in the kit and resize by 80%

3.Paste as a new layer on your white

4.Load mask (I have fit to canvas checked) in supplies or one of your choice and merge group

5.Open one of the frames and resize 50%

6.Paste as new layer

7.Move to the bottom of the tag

8.select your magic wand and click inside each frame til they are all selected,expand by 3

9.Open one of the papers and resize 80%

10.Paste as new layer and selection/invert/delete/select none

11.With frame layer highlighted select first frame with magic wand and expand by 4

12.Open one of the closeups and resize if necessary

13.Paste as new layer and move over the marching ants

14.Select/invert/delete/select none

15.Move this layer below frame layer

16.Do steps 11-15 twice more with each frame section

17.Highlight frame layer and merge down to each layer to the papers, so you are left with the mask layer and the frame layer

18.Add drop shadow to the frame

19.Open one of the swirls and resize 85%

20.Paste as new layer add drop shadow

21.Move up so it only overlaps the frame a little, move layer below frame layer

22.Open one of the flowers and resize 20%

23.Paste as new layer add drop shadow

24.Duplicate several times and place randomly around your tag

25.Open one of the bows and resize 10%

26.Paste as new layer add drop shadow

27.Duplicate several times and place randomly around your tag

28.Open one of the flowers with a stalk and resize 10%

29.Paste as new layer and add drop shadow

30.Duplicate a few times and place around your tag

31.Open your tube and resize if necessary

32.Paste as new layer and add drop shadow

33.Move layer down below frame layer

34.Merge Visible

35.Add copyright and watermark

36.Add your name


Hope you enjoyed my tutorial