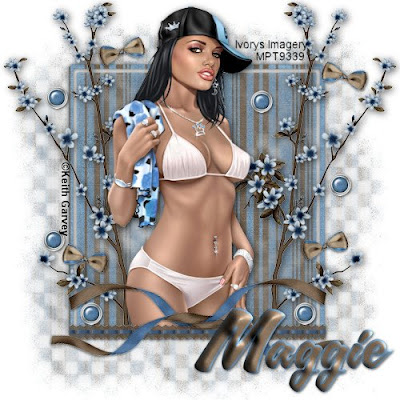
This tutorial was written by Ivory on 01/28/2009
Do not copy this tutorial and post through any kind of group or claim it as your own. Resemblance to any other tutorial is strictly coincidental.
This tutorial uses no filters
This tutorial uses no filters
You will need a tube of your choice.
I am using the art by Keith Garvey you can purchase his tubes HERE
Font of your choice
Scrapkit I used is Choco-latay Blues by Loneshell and can be purchased HERE
I used this Mask(Just right click and save in your mask folder)
2.Open one of the papers in the kit and resize by 18%
3.Paste as a new layer on your white
4.Load mask (I have fit to canvas checked) in supplies or one of your choice and merge group
5.Add drop shadow of your choice
6.Open one of the flower sprigs and resize by 70%
7.Paste as new layer and move to the left
8.Add drop shadow
9.Duplicate and mirror
10.Open one of the threaded ribbons and resize 40%
11.Paste as new layer add a drop shadow
12.Move it to the bottom of the mask
13.Open one of the twisty ribbons and resize by 45%
14.Paste as new layer and add drop shadow
15.Free rotate 15 degrees to the right
16.Duplicate and mirror
17.Open one of the brads and resize 5%
18.Paste as new layer and add a drop shadow
19.Duplicate several times and place randomly round your tag
20.Open one of the bows and resize 10%
21.Paste as new layer and add drop shadow
22.Move to the top right of your tag
23.Duplicate and mirror a couple more times
24.Place randomly round your tag
25.Open your tube and resize if neccessary
26.Paste as new layer,add drop shadow
27.Move this layer so the tube is below the threaded ribbon layer
28.Merge visible
29.Add copyright and watermark
30.Add your name
Hope you enjoyed my tutorial



























No comments:
Post a Comment