Saturday, January 31, 2009

Loot

This tutorial was written by Ivory on 01/31/2009
Do not copy this tutorial and post through any kind of group or claim it as your own. Resemblance to any other tutorial is strictly coincidental.
This tutorial uses no filters
You will need a tube of your choice.
I am using the art by Elias Chatzoudis you can purchase his tubes HERE
Font of your choice
Scrapkit I used is Wheres The Loot By Scrapz By Christon and can be purchased HERE

I used this Mask(Just right click and save in your mask folder)


1.Open a new image 500x500 white

2.Open one of the papers in the kit and resize by 80%

3.Paste as a new layer on your white

4.Load mask (I have fit to canvas checked) in supplies or one of your choice and merge group

5.Add drop shadow of your choice

6.Open the loot and tree clip art and paste as new layer

7.Add drop shadow and move slightly up and to the right

8.Open one of the flowers and resize 30%

9.Paste as new layer and add drop shadow

10.Move to the top left

11.Duplicate twice

12.Move these on the left and down

13.Open one of the ribbons and resize 60%

14.Paste as new layer free rotate 25 to the left and move to the bottom

14.Add drop shadow

15.Open one of the bows and resize 10%

16.Paste as new layer and add drop shadow

17.Place down on the ribbon

18.Duplicate a couple more times

19.Place along the ribbon

20.Open your tube and resize if neccessary

21.Paste as new layer and add drop shadow

22.Move to the left slightly

23.Merge visible

24.Add copyright and watermark

25.Add your name


Hope you enjoyed my tutorial
Hook

This tutorial was written by Ivory on 01/31/2009
Do not copy this tutorial and post through any kind of group or claim it as your own. Resemblance to any other tutorial is strictly coincidental.
This tutorial uses no filters
You will need a tube of your choice.
I am using the art by Maxine Gadd you can purchase her tubes HERE
Font of your choice
Scrapkit I used is Wheres The Loot By Scrapz By Christon and can be purchased HERE

I used this Mask(Just right click and save in your mask folder)
1.Open a new image 500x500 white

2.Open one of the papers in the kit and resize by 80%

3.Paste as a new layer on your white

4.Load mask (I have fit to canvas checked) in supplies or one of your choice and merge group

5.Add drop shadow of your choice

6.Open one of the frames and resize 60%

7.Paste as new layer and free rotate 90 to the right

8.Select your magic wand and click inside the frame

9.Selections/modify/expand by 2 pixels

10.Open your tube or graphic resize if neccessary and paste as new layer

11.Selections/invert/delete

12.Move this layer below the frame layer

13.Highlight frame layer and add drop shadow

14.Merge Down so the frame layer and the graphic layer are joined

14.Open one of the ribbons and resize 50%

15.Paste as new layer and move to the bottom left

16.Add drop shadow

17.Open one of the flowers and resize 20%

18.Paste as new layer and add drop shadow

19.Move to the top right

20.Duplicate and move to the lower left

21.Open the pirates hat clip art and resize 30%

22.Paste as new layer and add drop shadow

23.Move to the top left of the frame

24.Open the map clipart and paste as new layer

25.Add drop shadow and move to the top right

26.Move this layer down below the frame layer

27.Highlight top layer

28.Open the hook clipart and paste as new layer

29.Move to the left

30.Open one of the brads

31.Paste as new layer and add a drop shadow

32.Move to the middle of the hook on the left.

22.Merge visible

23.Add copyright and watermark

24.Add your name


Hope you enjoyed my tutorial

Cupid

This tutorial was written by Ivory on 01/31/2009
Do not copy this tutorial and post through any kind of group or claim it as your own. Resemblance to any other tutorial is strictly coincidental.
This tutorial uses no filters
You will need a tube of your choice.
I am using the art by Elias Chatzoudis you can purchase his tubes HERE
Font of your choice
Scrapkit I used is Hopelessly Devoted by Jillann's Creations and can be purchased HERE

I used this Mask(Just right click and save in your mask folder)
1.Open a new image 500x500 white

2.Open one of the papers in the kit and resize by 80%

3.Paste as a new layer on your white

4.Load mask (I have fit to canvas checked) in supplies or one of your choice and merge group

5.Add drop shadow of your choice and move down

6.Open one of the doodles and resize 85%

7.Paste as new layer and add drop shadow

8.Open one of the beaded wires and resize 70%

9.Paste as new layer and add drop shadow

10.Move to the bottom (see my tag for placement)

11.Open the heart clipart and paste as new layer

12.Add drop shadow and move to the top right

13.Open one of the bows and resize 40%

14.Paste as new layer and add drop shadow

15.Move to the Middle of the top heart

16.Duplicate and move to the middle of the secomd heart

17.Open one of the word art and resize by 80%

18.Paste as new layer and add a drop shadow

19.Move to the right and down slightly

20.Open your tube and resize if neccessary

21.Paste as new layer and add a drop shadow

22.Merge visible

23.Add copyright and watermark

28.Add your name


Hope you enjoyed my tutorial

Friday, January 30, 2009

Classy

This tutorial was written by Ivory on 01/30/2009
Do not copy this tutorial and post through any kind of group or claim it as your own. Resemblance to any other tutorial is strictly coincidental.
This tutorial uses no filters
You will need a tube of your choice.
I am using the art by Ismael Rac you can purchase his tubes HERE

Font of your choice
Scrapkit I used is Black & White by Scrappinwithliloleme and can be purchased HERE

I used this Mask(Just right click and save in your mask folder)


1.Open a new image 500x500 white

2.Open one of the papers in the kit and resize by 80%

3.Paste as a new layer on your white

4.Load mask (I have fit to canvas checked) in supplies or one of your choice and merge group

5.Add drop shadow of your choice

6.Open one of the ribbons and resize 30%

7.Paste as new layer add drop shadow

8.Move slightly to the bottom

9.Open one of the bows and resize 30%

10.Paste as new layer and add drop shadow

11.Move to the right (see my tag for placement)

12.Duplicate, and mirror

13.Move to the bottom

14.Open one of the bead ropes and resize 40%

15.Paste as new layer and add drop shadow

16.Move it to the right over the top bow

17.Open one of the flowers and resize 30%

18.Add drop shadow and move slightly to the right

19.Duplicate and move down

20.Open one of the butterflys and resize 20%

21.Paste as new layer and add drop shadow

22.Duplicate

23.Move one to the top bow and one to the bottom bow

24.Open your tube and resize if neccessary

25.Paste as New Layer and add drop shadow, move to the left

25.With the folded ribbon layer highlighted, move that layer so it is above the tube and over the base of her legs

26.Merge visible

27.Add copyright and watermark

28.Add your name


Hope you enjoyed my tutorial

Crush

This tutorial was written by Ivory on 01/30/2009
Do not copy this tutorial and post through any kind of group or claim it as your own. Resemblance to any other tutorial is strictly coincidental.
This tutorial uses no filters
You will need a tube of your choice.
I am using the art by Jose Cano you can purchase his tubes HERE

Font of your choice
Scrapkit I used is My Crush by Eclipse Creations and can be purchased HERE

I used this Mask(Just right click and save in your mask folder)
1.Open a new image 500x500 white
2.Open one of the papers in the kit and resize by 80%

3.Paste as a new layer on your white

4.Load mask (I have fit to canvas checked) in supplies or one of your choice and merge group

5.Add drop shadow of your choice and move down

6.Open one of the heart dangles and resize 70%

7.Paste as new layer and add drop shadow

8.Move slightly to the top

9.Open one of the double hearts and resize 30%

10.Paste as new layer and add drop shadow

11.Move to the right (see my tag for placement)

12.Open one of the heart strings and resize by 80%

13.Paste as new layer and add drop shadow

14.Move to the bottom of the tag

15.Open one of the bows and resize 20%

16.Paste as new layer and add drop shadow

17.Move to the top right,so its over the rings of the chain

18.Duplicate and mirror

19.Open one of the curly ribbons and resize by 20%

20.Paste as new layer,add drop shadow free rotate 90 to the right

21.Duplicate and move one to the right and one to the left

22.Move the layer down so the ribbon is under the corresponding bow

23.Open your tube and resize if neccessary

24.Paste as new layer and add a drop shadow

25.Highlight the heart string layer and bring it up above the tube layer

26.Merge visible

27.Add copyright and watermark

28.Add your name


Hope you enjoyed my tutorial

Golden Heart

This tutorial was written by Ivory on 01/29/2009
Do not copy this tutorial and post through any kind of group or claim it as your own. Resemblance to any other tutorial is strictly coincidental.
This tutorial uses no filters
You will need a tube of your choice.
I am using the art by Ismael Rac you can purchase his tubes HERE

Font of your choice
Scrapkit I used is Golden Carnelian By Scrapz By Christon and can be purchased HERE

I used this Mask(Just right click and save in your mask folder)


1.Open a new image 500x500 white

2.Open one of the papers in the kit and resize by 80%

3.Paste as a new layer on your white

4.Load mask (I have fit to canvas checked) in supplies or one of your choice and merge group

5.Add drop shadow of your choice

6.Open one of the doodles

7.Paste as new layer add drop shadow

8.Open one of the star dangles

9.Resize 30% and paste as new layer

10.Add drop shadow and move to the top left

11.Open the other star dagle and resize 25%

12.Paste as new layer and add drop shadow

13.Move to the right, below the the other star (see my tag)

14.Open one of the brads

15.Resize 50%

16.Paste as new layer and add drop shadow

17.Move to the end of the doodle

18.Duplicate and mirror a couple of times

19.Move to random places on your tag

20.Open your tube and resize if neccessary

21.Paste as new layer and add a drop shadow

22.Merge visible

23.Add copyright and watermark

24.Add your name


Hope you enjoyed my tutorial

Strawberry Delite

This tutorial was written by Ivory on 01/29/2009
Do not copy this tutorial and post through any kind of group or claim it as your own. Resemblance to any other tutorial is strictly coincidental.
This tutorial uses no filters
You will need a tube of your choice.
I am using the art by Elias Chatzoudis you can purchase his tubes HERE

Font of your choice
Scrapkit I used is Dark Strawberry Delite by Ivorys Designz (Tagger size) and can be purchased HERE

I used this Mask(Just right click and save in your mask folder)


1.Open a new image 500x500 white

2.Open one of the papers in the kit and resize by 80%

3.Paste as a new layer on your white

4.Load mask (I have fit to canvas checked) in supplies or one of your choice and merge group

5.Add drop shadow of your choice and move down

6.Open one of the flower doodles and resize 80%

7.Paste as new layer Mirror and flip and add drop shadow

8.Move slightly to the top left

9.Open one of the bows and resize 20%

10.Paste as new layer and add drop shadow

11.Move to the right (see my tag for placement)

12.Duplicate 4 times and place up the side of the mask

13.Duplicate one of the bows another 2 times

14.Move the opposite side of the mask

15.Open one of the bead danglys and resize by 60%

16.Paste as new layer and add drop shadow

17.Move it so the knot is in the middle of the top flower button

18.Open all 3 sequins and resize each one 30%

19.Paste each one as new layer adding a drop shadow to each

20.Duplicate each one several times and place randomly on the tag

21.Open your tube and resize if neccesary

22.Paste as new layer and add drop shadow

23.Merge visible

24.Add copyright and watermark

25.Add your name


Hope you enjoyed my tutorial

Thursday, January 29, 2009

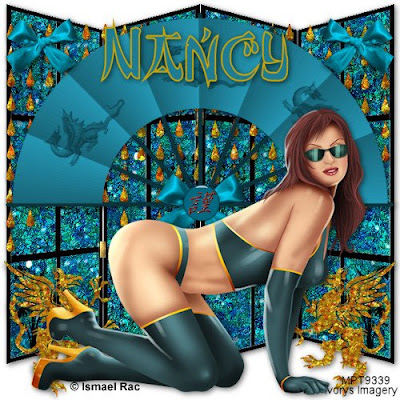
Turning Japanese

This tutorial was written by Ivory on 01/29/2009
Do not copy this tutorial and post through any kind of group or claim it as your own. Resemblance to any other tutorial is strictly coincidental.
This tutorial uses no filters
You will need a tube of your choice.
I am using the art by Ismael Rac you can purchase his tubes HERE
Font of your choice
Scrapkit I used is Chinatown by Scrap Nanly and can be purchased HERE


1.Open a new image 500x500 white

2.Open one of the screens and resize 90%

3.Paste as a new layer on your white and add drop shadow

4.OPen the golden raindrops and resize 60%

5.Paste as new layer and add drop shadow

6.Move to the top of the screen

7.Open one of the dragons and resize 30%

8.Paste as new Layer and add drop shadow

9.Move to lower right

10.Duplicate and Mirror

11.Open one of the fans

12.Paste as new layer and add drop shadow

13.Open one of the buttons and resize 20%

14.Paste as new layer and add drop shadow

15.Move to the middle of the bow on the fan

16.Open one of the bows and resize 20%

17.Paste as new layer and add drop shadow

18.Move to the top right

19.Duplicate and mirror

20.Open your tube and resize if neccessary

21.Paste as new layer and add a drop shadow

22.Move tube down to the bottom

23.Merge visible

24.Add copyright and watermark

24.Add your name


Hope you enjoyed my tutorial

Aqua

This tutorial was written by Ivory on 01/28/2009
Do not copy this tutorial and post through any kind of group or claim it as your own. Resemblance to any other tutorial is strictly coincidental.
This tutorial uses no filters
You will need a tube of your choice.
I am using the art by Ismael Rac you can purchase his tubes HERE
Font of your choice
Scrapkit I used is Mentha Piperita by Ivorys Designz and can be purchased HERE

I used this Mask(Just right click and save in your mask folder)


1.Open a new image 500x500 white

2.Open one of the papers in the kit and resize by 18%

3.Paste as a new layer on your white

4.Load mask (I have fit to canvas checked) in supplies or one of your choice and merge group

5.Add drop shadow of your choice and move down

6.Open one of the flower doodles and resize 70%

7.Paste as new layer Mirror and add drop shadow

8.Move slightly to the right

9.Open one of the bead strings and resize 60%

10.Paste as new layer and add drop shadow

11.Move to the right (see my tag for placement)

12.Duplicate, and mirror

13.Open the bead ribbon and resize 50%

14.Paste as new layer and add drop shadow

15.Move to the bottom of the tag

16.Open one of the bows and resize 30%

17.Paste as new layer and free rotate 20 to the right

18.Add drop shadow and move to the top right

19.Duplicate and mirror

20.Open the sequins and resize both 20%

21.Paste as new layers and add drop shadows

22.Duplicate several times and place randomly around the tag (see my tag)

23.Open your tube and resize if neccessary

24.Paste as new layer and add a drop shadow

25.With the Bead ribbon layer highlighted, move that layer so it is above the tube and over the base of her legs

26.Merge visible

27.Add copyright and watermark

28.Add your name


Hope you enjoyed my tutorial

Chocolatay


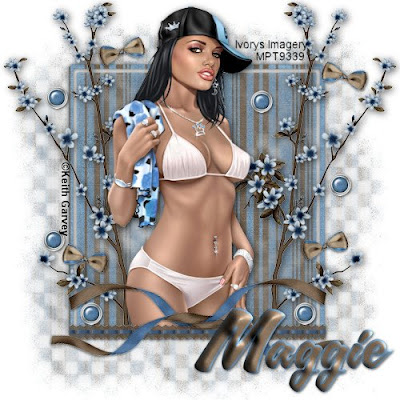
This tutorial was written by Ivory on 01/28/2009
Do not copy this tutorial and post through any kind of group or claim it as your own. Resemblance to any other tutorial is strictly coincidental.
This tutorial uses no filters
You will need a tube of your choice.
I am using the art by Keith Garvey you can purchase his tubes HERE

Font of your choice
Scrapkit I used is Choco-latay Blues by Loneshell and can be purchased HERE
I used this Mask(Just right click and save in your mask folder)


1.Open a new image 500x500 white

2.Open one of the papers in the kit and resize by 18%

3.Paste as a new layer on your white

4.Load mask (I have fit to canvas checked) in supplies or one of your choice and merge group

5.Add drop shadow of your choice

6.Open one of the flower sprigs and resize by 70%

7.Paste as new layer and move to the left

8.Add drop shadow

9.Duplicate and mirror

10.Open one of the threaded ribbons and resize 40%

11.Paste as new layer add a drop shadow

12.Move it to the bottom of the mask

13.Open one of the twisty ribbons and resize by 45%

14.Paste as new layer and add drop shadow

15.Free rotate 15 degrees to the right

16.Duplicate and mirror

17.Open one of the brads and resize 5%

18.Paste as new layer and add a drop shadow

19.Duplicate several times and place randomly round your tag

20.Open one of the bows and resize 10%

21.Paste as new layer and add drop shadow

22.Move to the top right of your tag

23.Duplicate and mirror a couple more times

24.Place randomly round your tag

25.Open your tube and resize if neccessary

26.Paste as new layer,add drop shadow

27.Move this layer so the tube is below the threaded ribbon layer

28.Merge visible

29.Add copyright and watermark

30.Add your name


Hope you enjoyed my tutorial

Sunday, January 25, 2009

Dark Lust

This tutorial was written by Ivory on 01/25/2009
Do not copy this tutorial and post through any kind of group or claim it as your own. Resemblance to any other tutorial is strictly coincidental.
This tutorial uses no filters
You will need a tube of your choice.
I am using the art by Elias Chatzoudis you can purchase his tubes HERE

Font of your choice
Scrapkit I used is Dark Lust by Scrapz by Christon and is no longer available but the supplies are HERE

I used this Mask(Just right click and save in your mask folder)
1.Open a new image 500x500 white

2.Open one of the papers in the kit and resize by 18%

3.Paste as a new layer on your white

4.Load mask (I have fit to canvas checked) in supplies or one of your choice and merge group

5.Lower opacity to 65%

6.Open one of the papers and resize by 17%

7.Cut a circle approx 300x300 and paste as new layer

8.Add a drop shadow and move to the top right

9.Open one of the papers and resize 17%

10.Cut a circle approx 260x260

11.Paste as new layer and add a drop shadow

12.Open one of the papers and resize by 17%

13.Cut a circle approx 170x170

14.Paste as new layer and move to the lower right

15.Add drop shadow

16.Open one of the hearts resize by 5%

17.Paste as new layer and move to the lower right

18.Add a drop shadow

19.Duplicate and mirror

20.Move to the top left

21.Open one of the bows and resize by 10%

22.Paste as new layer add drop shadow

23.Duplicate twice more and move the bows to the top of each circle

24.Open your tube resizing if neccessary

25.Paste as new layer and add drop shadow

26.Move to the left

27.Merge visible

28.Add copyright and watermark

29.Add your name


Hope you enjoyed my tutorial

Make My Day

This tutorial was written by Ivory on 01/25/2009
Do not copy this tutorial and post through any kind of group or claim it as your own. Resemblance to any other tutorial is strictly coincidental.
This tutorial uses no filters
You will need a tube of your choice.
I am using the art by Elias Chatzoudis you can purchase his tubes HERE

Font of your choice
Scrapkit I used is Grungy Days by Scrapz by Christon and is no longer available but the supplies are HERE

I used this Mask(Just right click and save in your mask folder)


1.Open a new image 500x500 white

2.Open one of the papers in the kit and resize by 18%

3.Paste as a new layer on your white

4.Load mask (I have fit to canvas checked) in supplies or one of your choice and merge group

5.Add drop shadow of your choice

6.Open one of the buckles and resize by 10%

7.Paste as new layer and place up on the top of the upper box and add drop shadow

8.Duplicate and move to the other end of the top box

9.New Layer

10.Select text tool and in a font of your choice write "Go ahead make my day" or text of your choice in the top box, leaving a space in the middle between the lines

11.Add a drop shadow

12.Open one of the bows and resize by 5%

13.Paste as new layer and move to the center of the top box between the lines of text

14.Add drop shadow

15.Open one of the dangly bows and resize by 10%

16.Paste as new layer and move to the middle of the boxes

17.Add a drop shadow

18.Duplicate and move to the corner of the top box

19.Open your tube, resizing if neccessary

20.Paste as new layer

21.Add drop shadow of your choice

22.Place to the right side

23.Merge visible

24.Add copyright and watermark

25.Add your name


Hope you enjoyed my tutorial

Friday, January 23, 2009

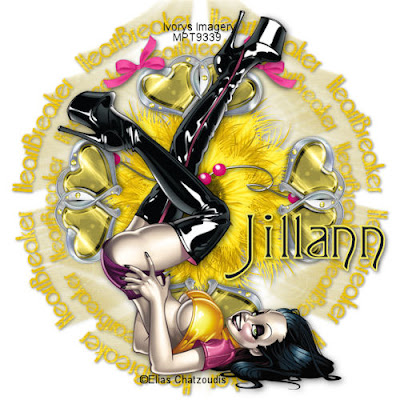
Heartbreaker


This tutorial was written by Ivory on 01/23/2009
Do not copy this tutorial and post through any kind of group or claim it as your own.
Resemblance to any other tutorial is strictly coincidental.
This tutorial uses no filters
You will need a tube of your choice.
I am using the art by Elias Chatzoudis you can purchase his tubes HERE

Font of your choice
Scrapkit I used is Seriously Kaleb by Jillanns Creations and can be purchased HERE

I used this Mask(Just right click and save in your mask folder)


1.Open a new image 500x500 white

2.Open one of the papers in the kit and resize by 80%

3.Paste as a new layer on your white

4.Load mask (I have fit to canvas checked) in supplies or one of your choice and merge group

5.Add drop shadow of your choice

6.Open one of the pompom flowers and paste as new layer

7.Add drop shadow

8.Open one of the double heart gems and resize by 40%

9.Paste as new layer and add drop shadow

10.Move to the top of the pompom

11.Add drop shadow

12.Duplicate this layer and rotate 90 degrees to the right

13.Repeat twice more

14.Open a bead string and resize by 40%

15.Paste as new layer and move the layer down below the hearts

16.Add drop shadow

17.Highlight top layer

18.Open a bow and resize by 20%

19.Move to the top just by the hearts

20.Add drop shadow

21.Duplicate and mirror

22.Open your tube and resize if neccessary

23.Paste as new layer

24.Add Drop shadow

25.Merge visible

26.Add copyright and watermark

27.Add your name


Hope you enjoyed my tutorial

Respect

This tutorial was written by Ivory on 01/23/2009
Do not copy this tutorial and post through any kind of group or claim it as your own.
Resemblance to any other tutorial is strictly coincidental.
This tutorial uses no filters
You will need a tube of your choice.
I am using the art by Ismael Rac you can purchase his tubes HERE

Font of your choice
Scrapkit I used is Seriously Kaleb by Jillanns Creations and can be purchased HERE

1.Open a new image 500x500 white

2.Open one of the round frames, resize by 75% and paste as new layer

3.Using your magic wand, click inside the frame til you get the marching ants and expand by 3

4.Open one of your papers and resize by 70%

5.Paste as a new layer and then selections/invert/delete

6.Move the paper layer below the frame layer

7.Click on frame layer and merge down

8.Add a drop shadow and move to the top left

9.Duplicate steps 2 - 8, resizing frame by 70% and using a different color frame and paper

10.When completed move to the bottom right

11.Open one of the flower doodles and resize by 70%

12.Paste as new layer and flip

13.Move the right side

14.Add drop shadow

15.Open 2 different colored bows

16.Resize by 40%

17.Paste as new layers and put one on top circle and one on the bottom one

18.Add drop shadow to each

19.Open your tube and resize if neccessary

20.Paste as new layer and move to the left

21.Add drop shadow

22.Open the alpha and copy and paste the word RESPECT

23.Move the beads so they are at the bottom of her legs

24.Merge each bead layer down til they are all one layer

25.Add drop shadow

26.Merge visible

27.Add copyright and watermark

28.Add your name


Hope you enjoyed my tutorial

Chocalove

This tutorial was written by Ivory on 01/23/2009
Do not copy this tutorial and post through any kind of group or claim it as your own.
Resemblance to any other tutorial is strictly coincidental.
This tutorial uses no filters
You will need a tube of your choice.
I am using the art by Ismael Rac you can purchase his tubes HERE

Font of your choice
Scrapkit I used is A ChocaLove by Southernscrapz and can be purchased HERE

I used this Mask(Just right click and save in your mask folder)
1.Open a new image 500x500 white

2.Open one of the papers in the kit and resize by 80%

3.Paste as a new layer on your white

4.Load mask (I have fit to canvas checked) in supplies or one of your choice and merge group

5.Add drop shadow of your choice

6.Open one of the glitter doodles and paste as new layer

7.Add drop shadow

8.Move it to the bottom right

9.Duplicate and mirror and flip

10.Open one of the heart bows and resize by 50%

11.Move to the middle of the bottom right large circle of glitter,add a drop shadow

12.Duplicate this layer and mirror, moving it so its in the middle of the other large glitter circle

13.Open one of the balloons and resize by 50%

14.Paste as new layer and move to the top left (see my tag)

15.Free rotate by 20 and add drop shadow

16.Duplicate and mirror, move it so it slightly overlaps the other

17.Open a bead string and resize by 40%

18.Paste as new layer and move so it is over the ends of the balloons

19.Add drop shadow

20.Open one of the flowers and resize by 40%

21.Paste as new layer and add drop shadow

22.Duplicate several and move them so they are randomly placed around your tag

23.You can make one or two slightly smaller and add those too like I have done if you wish

24.Open your tube and resize if neccessary

25.Paste as new layer

26.Add Drop shadow

27.Merge visible

28.Add copyright and watermark

29.Add your name


Hope you enjoyed my tutorial

Pink Valentine

This tutorial was written by Ivory on 01/23/2009
Do not copy this tutorial and post through any kind of group or claim it as your own. Resemblance to any other tutorial is strictly coincidental.
This tutorial uses no filters
You will need a tube of your choice.
I am using the art by Ismael Rac you can purchase his tubes HERE

Font of your choice
Scrapkit I used is A ChocaLove by Southernscrapz and can be purchased HERE

I used this Mask(Just right click and save in your mask folder)


1.Open a new image 500x500 white

2.Open one of the papers in the kit and resize by 80%

3.Paste as a new layer on your white

4.Load mask (I have fit to canvas checked) in supplies or one of your choice and merge group

5.Add drop shadow of your choice

6.Open one of the glitter doodles and paste as new layer

7.Add drop shadow

8.Move it to the top right

9.Duplicate and mirror

10.Open one of the chocolates and paste as new layer

11.Move to the middle of the top right large circle of glitter,add a drop shadow

12.Duplicate this layer and mirror

13.Open one of heart ribbons and resize by 70%

14.Paste as new layer and move to the bottom of the mask (see my tag)

15.Add drop shadow

16.Open the chocolate heart and resize by 35%

17.Paste as new layer and move to the left

18.Add Drop shadow

19.Open the crimson heart and resize by 20%

20.Paste as new layer and move so its inside the chocolate heart

21.Add drop shadow

22.With the crimson heart layer highlighted merge down

23.Duplicate and mirror this layer, move it slightly down lower

24.Open one of the flowers and resize by 15%

25.Paste as new layer and add drop shadow

26.Duplicate this layer and place in random places on your tag (see mine for idea)

27.Open your tube and resize if neccessary

28.Paste as new layer

29.Move down so she is sitting on the ribbon

30.Add Drop shadow

23.Merge visible

24.Add copyright and watermark

25.Add your name


Hope you enjoyed my tutorial

Tuesday, January 20, 2009

Blue Bling

This tutorial was written by Ivory on 01/19/2009
Do not copy this tutorial and post through any kind of group or claim it as your own. Resemblance to any other tutorial is strictly coincidental.
This tutorial uses no filters
You will need a tube of your choice.I am using the art by Ismael Rac you can purchase his tubes HERE
Font of your choice
Scrapkit I used is Iced Love by Kirstys Scraps and can be purchased HERE

I used this Mask(Just right click and save in your mask folder)


1.Open a new image 500x500 white

2.Open one of the papers in the kit and resize by 80%

3.Paste as a new layer on your white

4.Load mask (I have fit to canvas checked) in supplies or one of your choice and merge group

5.Add drop shadow of your choice

6.With your magic wand select the square area of the mask so you have marching ants

7.Paste the close up tube as new layer and when its positioned,selections/invert/delete/ select none

8.Lower opacity to 60%

9.Open stem and resize by 80%

10.Paste as a new layer and move to the flat edge of the mask

11.Add a drop shadow

12.Duplicate this layer and mirror

13.Open one of the bows

14.Resize by 20%

15.Paste as a new layer move down and add drop shadow (see my tag for placement)

16.Duplicate twice more and move them into position on the right hand stem

17.Open your tube and paste as a new layer, resizing if neccessary

18.Move to the left and add drop shadow

19.Open sparkle 2

20.Resize by 85%

21.Paste as new layer (see my tag for placement)

22.Add slight drop shadow

23.Merge visible

24.Add copyright and watermark

25.Add your name


Hope you enjoyed my tutorial

Friday, January 16, 2009

Dead Men

This tutorial was written by Ivory on 01/15/2009
Do not copy this tutorial and post through any kind of group or claim it as your own. Resemblance to any other tutorial is strictly coincidental.
This tutorial uses no filters
You will need a tube of your choice.I am using the art by Scott Blair you can purchase his tubes HERE
Font of your choice
Scrapkit I used is Pretty Dirty Pirate by Kirsty Scrapz and can be
purchased HERE

I used this Mask(Just right click and save in your mask folder)


1.Open a new image 500x500 white

2.Open one of the papers in the kit and resize by 80%

3.Paste as a new layer on your white

4.Load mask (I have fit to canvas checked) in supplies or one of
your choice and merge group

5.Add drop shadow of your choice

6.Open a scroll and paste as new layer

7.Add slight drop shadow and move down

8.Open the eye patch, paste as new layer

9.Image/mirror

10.Add drop shadow

11.Move it down over the scroll

12.Open two of the bottles and resize by 30%

13.Paste as new layer

14.Add slight drop shadow and move so they sit on the top of the
scroll

15.Open one of the ribbons and resize 15%

16.Paste as new layer and move over the bottles,move the bottles
closer together if you need to

17.Add drop shadow

18.Activate the scroll layer

19.Open the 3 brads

20.Resize by 30%

21.Paste several as new layers and move them into position

22.Add drop shadow

23.Activate top layer

24.Open your tube

25.Paste as new layer, resizing if neccessary

26.Move to the left

27.Add drop shadow

28.Merge visible

29.Add copyright and watermark

30.Add your name


Hope you enjoyed my tutorial

Thursday, January 15, 2009

USA

This tutorial was written by Ivory on 01/15/2009
Do not copy this tutorial and post through any kind of group or claim it as your own. Resemblance to any other tutorial is strictly coincidental.
This tutorial uses no filters
You will need a tube of your choice.I am using the art by Ismael Rac you can purchase his tubes HERE
Font of your choice
Scrapkit I used is Pieces of the Puzzle by Scrapz By Christon and can be purchased HERE

I used this Mask(Just right click and save in your mask folder)


1.Open a new image 500x500 white

2.Open one of the papers in the kit and resize by 80%

3.Paste as a new layer on your white

4.Load mask (I have fit to canvas checked) in supplies or one of your choice and merge group

5.Add drop shadow of your choice

6.Open one of the papers and cut a piece 400x300

7.Image/add borders/ symetric checked (2)pixels in a contrasting color

8.Paste as a new layer

9.Add a drop shadow V13 H7 O60 B5 Color Black

10.Add New layer

11.Add wording of your choice, I wrote USA in stars and stripes font

12.Add Drop shadow

13.Open one of the tied strings

14.Resize by 70%

15.Paste as a new layer move down and add drop shadow (see my tag for placement)

16.Open one of the wavy ribbons and resize by 50%

17.Paste as new layer and add drop shadow

18.Move to the left

19.Open another wavy ribbon

20.Resize by 40%

21.Paste as new layer and move to the left

22.Open one of the bows

23.Resize by 15%

24.Paste as new layer

25.Add drop shadow and move to the left over the ends of the ribbons

26.Open your tube and resize if neccessary

27.Paste as new layer and add drop shadow

28.Merge visible

29.Add copyright and watermark

30.Add your name


Hope you enjoyed my tutorial

Monday, January 12, 2009

Winter Blessings

This tutorial was written by Ivory on 01/12/2009
Do not copy this tutorial and post through any kind of group or claim it as your own. Resemblance to any other tutorial is strictly coincidental.
This tutorial uses no filters
You will need a tube of your choice.I am using the art by Elias Chatzoudis you can purchase his tubes HERE
Font of your choiceScrapkit I used is Winter Blessings by Scrapz By Christon and can be purchased HERE

I used this Mask(Just right click and save in your mask folder)


1.Open a new image 500x500 white

2.Open one of the papers in the kit and resize by 80%

3.Paste as a new layer on your white

4.Load mask (I have fit to canvas checked) in supplies or one of your choice and merge group

5.Add drop shadow of your choice

6.Open one of the papers and cut a piece 400x70

7.Paste as new layer and rotate by 4% to the left

8.Duplicate and mirror and move it slightly down, so the 2 strips are slightly overlapped

9.Add a drop shadow to each strip and merge these two strip layers together (not merge visible)

10.Repeat 6-8 with a different color paper and rotate to the right not left

11.Add a drop shadow to each strip and merge these two layers together

12.Open one of the stars and paste as a new layer on each strip section

13.Add drop shadow

14.Open one of the beadstrings and resize by 65%

15.Paste as a new layer and add drop shadow

16.Open one of the stars and resize by 50%

17.Paste as new layer and add drop shadow

18.Move into position of your choice

19.Duplicate and move to various positions on the tag

20.Open your tube,resize if necessary

21.Paste as new layer

22.Add drop shadow

23.Merge visible

24.Add copyright and watermark

25.Add your name


Hope you enjoyed my tutorial

Saturday, January 10, 2009

Sea Green

This tutorial was written by Ivory on 01/10/2009
Do not copy this tutorial and post through any kind of group or claim it as your own.
Resemblance to any other tutorial is strictly coincidental.
This tutorial uses no filters
You will need a tube of your choice.I am using the art by Ismael Rac you can purchase his tubes HERE
Font of your choiceScrapkit I used is Loopy Lime Tagger Kit by Ivorys Designz and can be purchased HERE

I used this Mask(Just right click and save in your mask folder)
1.Open a new image 500x500 white

2.Open one of the papers in the kit and resize by 85%

3.Paste as a new layer on your white

4.Load mask (I have fit to canvas checked) in supplies or one of your choice and merge group

5.Add drop shadow of your choice

6.Open one of the flower doodles and resize by 80%

7.Paste as a new layer,Add Drop shadow

8.Open one of the bows and resize by 40%

9.Paste as new layer

10.Move to the edge of the mask at the top right,

11.Move it up so it is over the journalling

12.Add a drop shadow

13.Duplicate and move that one to the lower left.

14.Open one of the curly ribbons and resize by 30%

15.Paste as new layer and add drop shadow

16.Move this layer so it is under the top bow (see my tag)

17.Duplicate and move into position under the lower bow

18.Open your tube and paste as a new layer

19.Resize if necessary

20.Add drop shadow and move to the left.

21.Merge visible

22.Add copyright and watermark

23.Add your name


Hope you enjoyed my tutorial

Sexy Cupid

This tutorial was written by Ivory on 01/10/2009
Do not copy this tutorial and post through any kind of group or claim it as your own.
Resemblance to any other tutorial is strictly coincidental.
This tutorial uses no filters
You will need a tube of your choice.I am using the art by Elias Chatzoudis you can purchase his tubes HERE
Font of your choiceScrapkit I used is A Valentine Wish by Scrapz By Christon and can be purchased HERE

I used this Mask(Just right click and save in your mask folder)
1.Open a new image 500x500 white

2.Open one of the papers in the kit and resize by 80%

3.Paste as a new layer on your white

4.Load mask (I have fit to canvas checked) in supplies or one of your choice and merge group

5.Add drop shadow of your choice and move down slightly

6.Open one of the journalling tags and resize by 70% and paste a new layer and move layer down below the mask layer

7.Add Drop shadow, free rotate this tag layer to the left 8 degrees and reposition

8.Move to the top right.

9.Open one of the button labels and resize by 60%

10.Paste as a new layer and add drop shadow

11.Move it up so it is over the journalling

12.Open one of the eyelet bows and resize by 50%

13.Paste as a new layer, add a drop shadow and move it up so it is half on and half off the journalling tag

14.Open one of the buttons, resize by 50% and paste as a new layer

15.Add a drop shadow

16.Move to the journalling tag (see my tag for positioning)

17.Duplicate and move into position.

18.Open your tube and paste as a new layer

19.Resize if necessary

20.Add drop shadow and move to the left.

21.Merge visible

22.Add copyright and watermark

23.Add your name


Hope you enjoyed my tutorial

Love You

This tutorial was written by Ivory on 01/10/2009
Do not copy this tutorial and post through any kind of group or claim it as your own.
Resemblance to any other tutorial is strictly coincidental.
This tutorial uses no filters
You will need a tube of your choice.I am using the art by Keith Garvey you can purchase his tubes HERE
Font of your choice
Scrapkit I used is I Cant Love You by Kirsty Scraps and can be purchased HERE

I used this Mask(Just right click and save in your mask folder)


1.Open a new image 500x500 white

2.Open one of the papers in the kit and resize by 80%

3.Paste as a new layer on your white

4.Load mask (I have fit to canvas checked) in supplies or one of your choice and merge group

5.Add drop shadow of your choice

6.Open the glitter and paste as new layer, add drop shadow of your choice

7.Open the ribbon heart and resize by 60% paste as a new layer add a drop shadow

8.Move to the top right.

9.Open the glitter lips and resize by 60%

10.Move to bottom Right

11.Open your tube and paste as new layer,resizing if neccesary

12.Add Drop shadow, move to the left

13.Merge visible

14.Add copyright and watermark

15.Add your name


Hope you enjoyed my tutorial

Wednesday, January 7, 2009

Beach Babe

This tutorial was written by Ivory on 07/01/2009
Do not copy this tutorial and post through any kind of group or claim it as your own.
Resemblance to any other tutorial is strictly coincidental.
This tutorial uses no filters
You will need a tube of your choice.I am using the art by Tom Hoover you can purchase his tubes HERE
Font of your choice
Scrapkit I used is Anchors Away by Jillann Creations and can be purchased HERE

I used this Mask(Just right click and save in your mask folder)


1.Open a new image 500x500 white

2.Open one of the papers in the kit and resize by 80%

3.Paste as a new layer on your white

4.Load mask (I have fit to canvas checked) in supplies or one of your choice and merge group

5.Add drop shadow of your choice, lower opacity to 70%

6.Open one of the frames and resize by 85% paste as a new layer add a drop shadow move to the top.

7.Open Tube and resize if neccesary

8 Paste as new layer and add a drop shadow , moving into position on the frame

9.Open the sun doodle and paste as a new layer

10.Add a drop shadow and move the layer to below the frame layer

11.Staying on this layer

12.Open the lighthouse sticker and resize by 70%

13.Paste as a new layer and add a drop shadow

14.Select top layer

15.Open beach ball sticker and resize by 40%

16.Paste as new layer and add a drop shadow, Place several randomly on your tag

17.Merge Visible

18.Add copyright and watermark

19.Add your name


Hope you enjoyed my tutorial

Devoted

This tutorial was written by Ivory on 07/01/2009
Do not copy this tutorial and post through any kind of group or claim it as your own. Resemblance to any other tutorial is strictly coincidental.
This tutorial uses no filters
You will need a tube of your choice.
I am using the art by Elias Chatzoudis you can purchase his tubes HERE
Font of your choice
Scrapkit I used is Hopelessly Devoted by Jillann Creations and can be purchased HERE
I used this Mask(Just right click and save in your mask folder)

1.Open a new image 500x500 white

2. Open one of the papers in the kit and resize by 80%

3. Paste as a new layer on your white

4.Load mask (I have fit to canvas checked) in supplies or one of your choice and merge group

5.Add drop shadow of your choice, lower opacity to 65%

6. Open one of the sequin doodles and resize by 60% paste as a new layer add a drop shadow

7.Duplicate the doodle layer and mirror

8 Open the heart clip art and paste as new layer, move to the top right of the mask

9.Add drop shadow

10.Open one of the glitter doodles, paste as new layer and move to below the heart layer, position as you like.

11.Open your tube and paste as new layer,resizing if neccesary

12.Add Drop shadow, move to the left

13.Open word art and resize by 70%

14.Paste as new layer and move to the right under the hearts

15.Merge visible

16.Add copyright and watermark

17.Add your name


Hope you enjoyed my tutorial